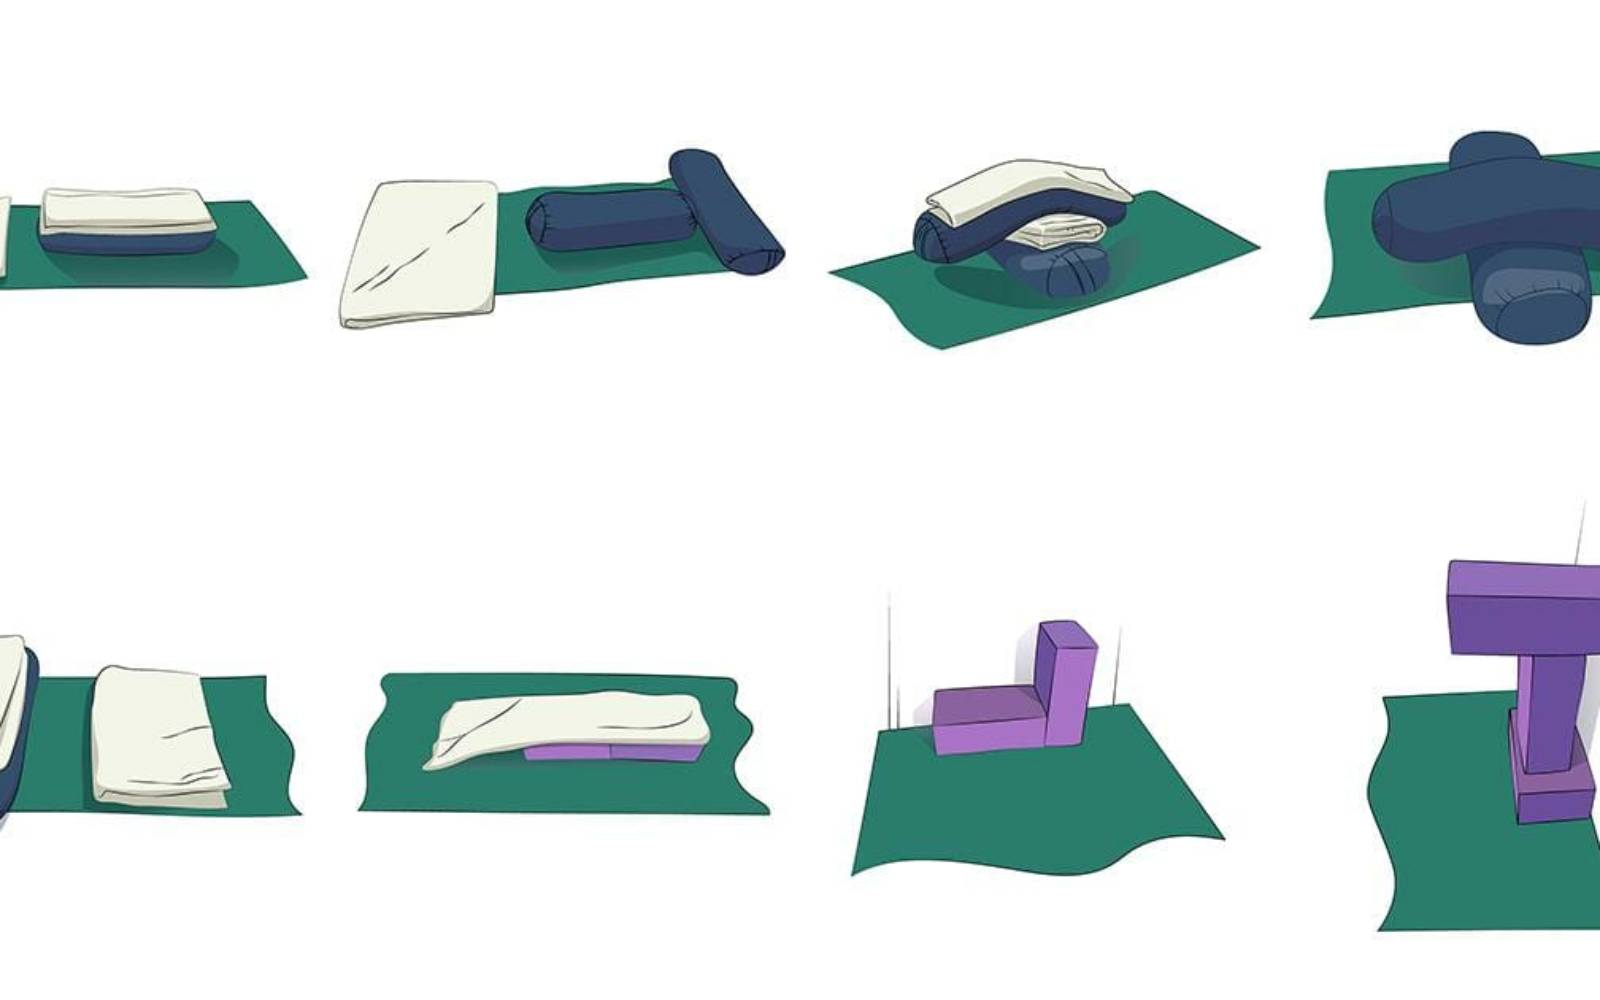
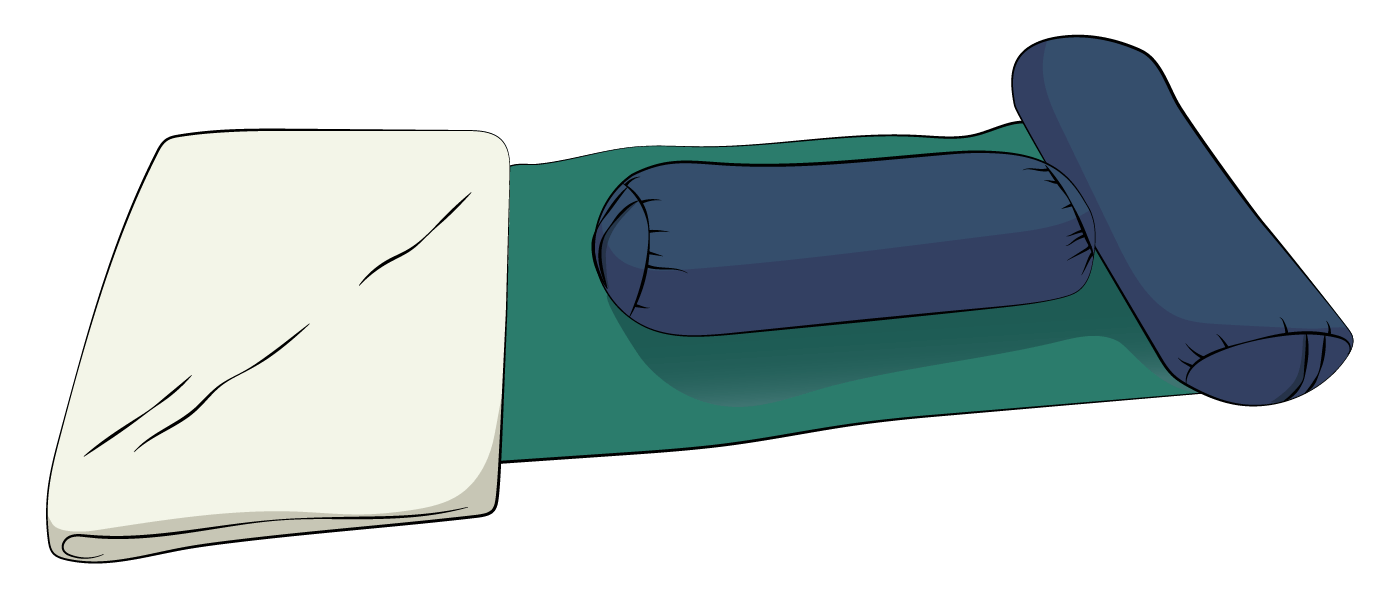
Types of blanket folds in Iyengar yoga
We will make reference to 4 primary ways of folding your blanket throughout this guide, so let’s take a look at them.

Equipment for asanas and poses
The configuration of all the props in Iyengar yoga can be confusing. We’ve put together a guide to many of the variations and set-ups that you are likely to encounter.
Pincha Mayurasana
The primary purpose of the block support in this pose is to stop the hands from scissoring in.
Equipment required
- 2 x full-width blocks
- 1 x yoga mat
Instructions for props
Here you will see there are two blocks for those with wider shoulders. Those with broader shoulders should use this setup. Those with less broad shoulders can get by with just 1 horizontal brick, lying flat.
Video instruction
We have two videos demonstrating Pincha Mayurasana. You can view the video explainer for Pincha Mayurasana here and Pincha Mayurasana with belt for support around the elbows here.
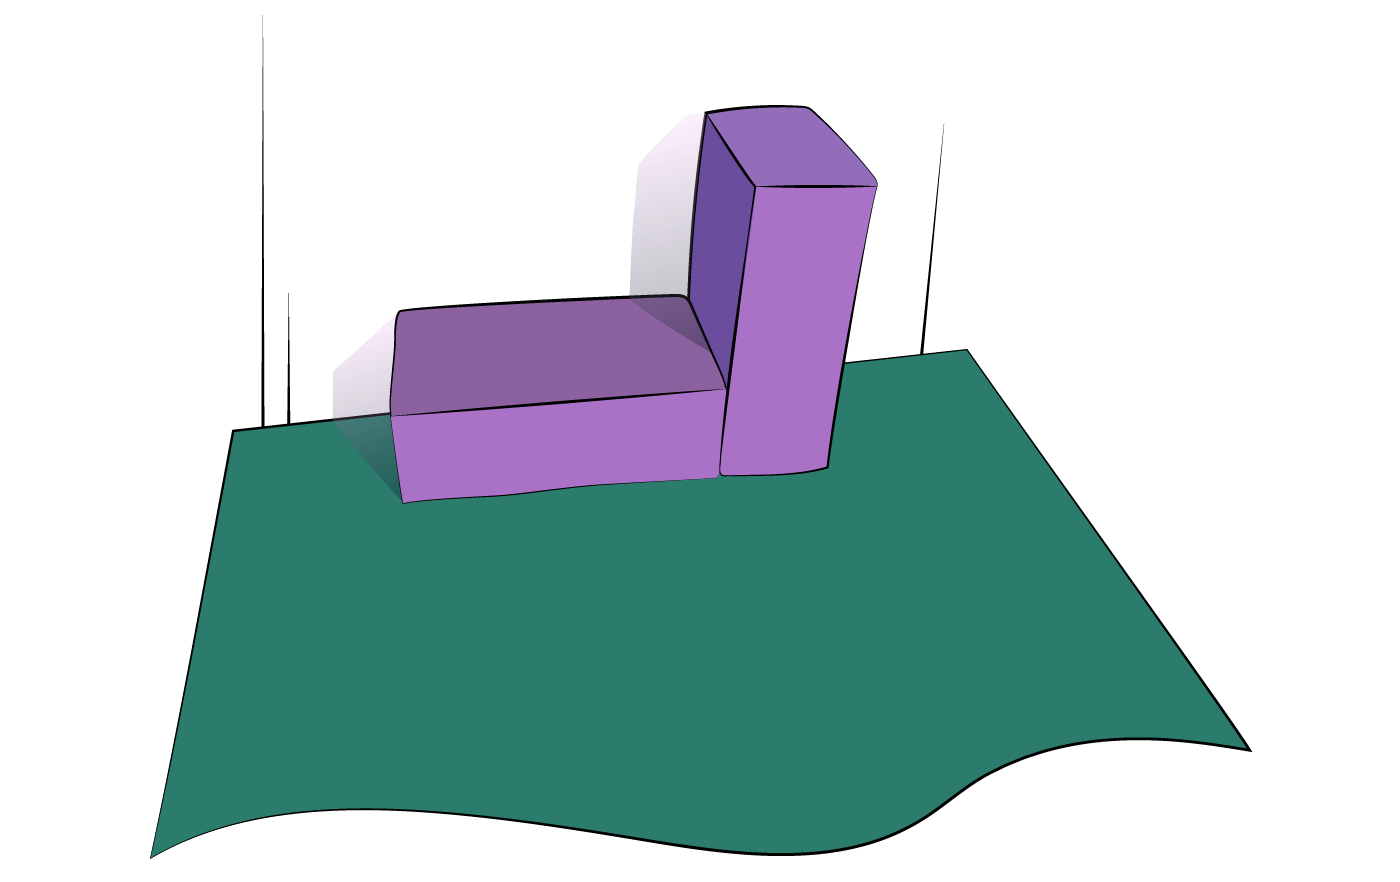
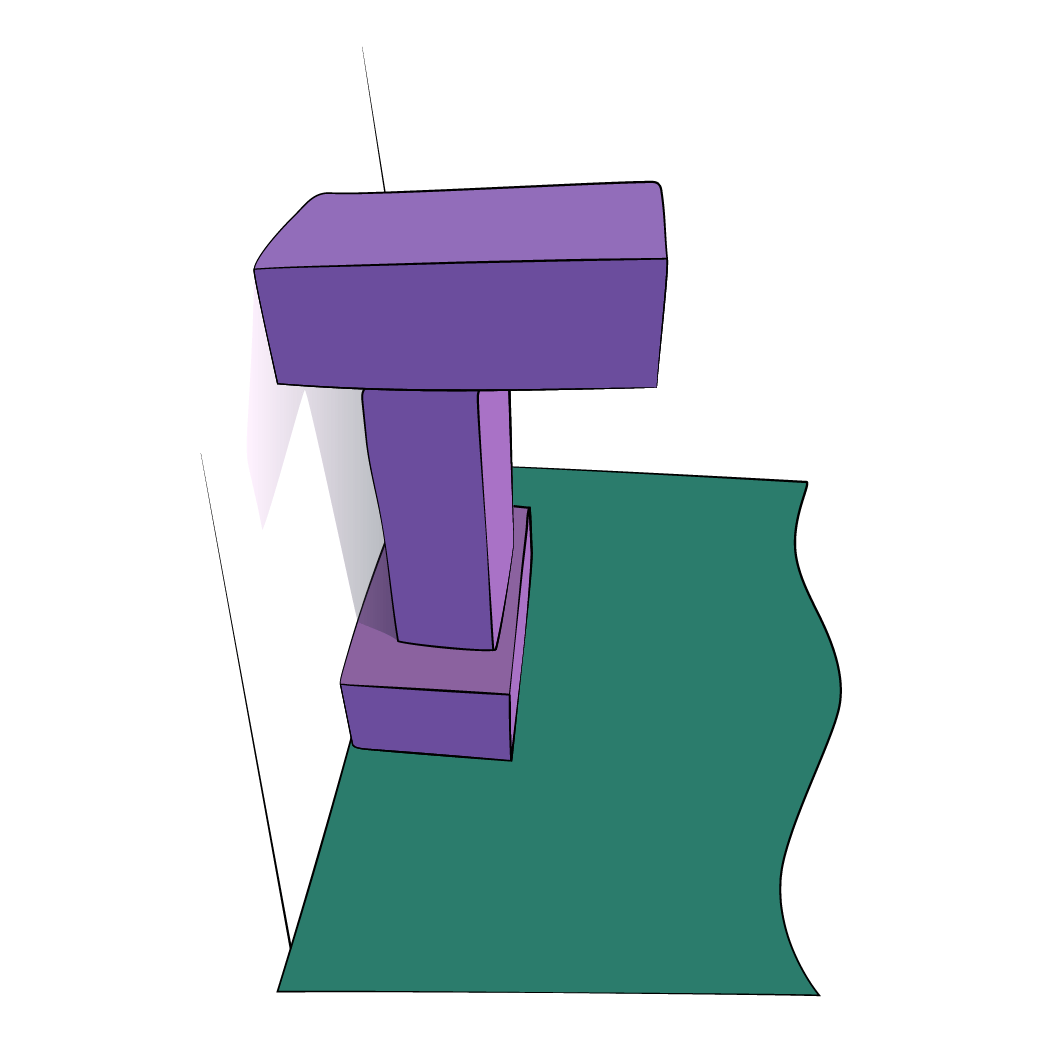
Salamba Sirsasana (Headstand) Preparation
When preparing the body for headstand or when choosing to stay with the preparation – maybe on account of stiffness or injury – we can use a few different setups of blocks to support the shoulders and upper back.
Equipment required
- 3 x full-width blocks
- 1 x yoga mat
Instructions for props
The first block is placed on the ground, against the wall horizontally. The second block is upright with the broad side facing out as close to the centre of the bottom block as you can. The third block is the one which targets the dorsal spine and should be placed broadside down, perpendicular to the wall, balanced over block number two.
Please note that if you are taller and the block is high on the shoulder blades, you can build up your base until block number 3 properly hits your lower shoulder blade and mid-thoracic.
Neck release over blocks
This configuration is often used to bring release and relief to the cervical-thoracic vertebrae, or the region between the lower part of your neck and your upper back.
Equipment required
- 2 x full-width blocks
- 1 x blanket
- 1 x yoga mat
Instructions for props
This set up should be done well away from the wall. Start by placing your two blocks about two thirds towards one end of the mat. Place them one against the other, with their broad side flat against the floor.
Place your standard shoulder-stand-fold blanket on top. This will allow you to easily slide from one stage of the pose to the next and limits friction against clothing or the skin.
Please note, that if the buttocks are dropping off the back of the blocks, or touching the floor, take an extra block and put it in the same row with the other two.
Viparita Karani
The equipment set up for Viparita Karani is designed to lift the buttocks above the chest, with legs extended up against the wall. Shoulders and head are to the floor. It is part of a restorative sequence of poses and aims to release the diaphragm and facilitate exhalation and calm the nerves.
Equipment required
- 1 x bolster
- 3-4 x blankets
- 1 x yoga mat
Instructions for props
Place your bolster 3-4 fingers-width away from the wall, with the fingers together (no spreading of the fingers). Place 2-3 half-fold blankets on top for the buttocks to rest on. If you are taller you will need a little more height and you can adjust using more half-fold blankets.
Take an extra blanket and place it in a position that will let you reach for it and put it under the neck and head once you have entered the pose.
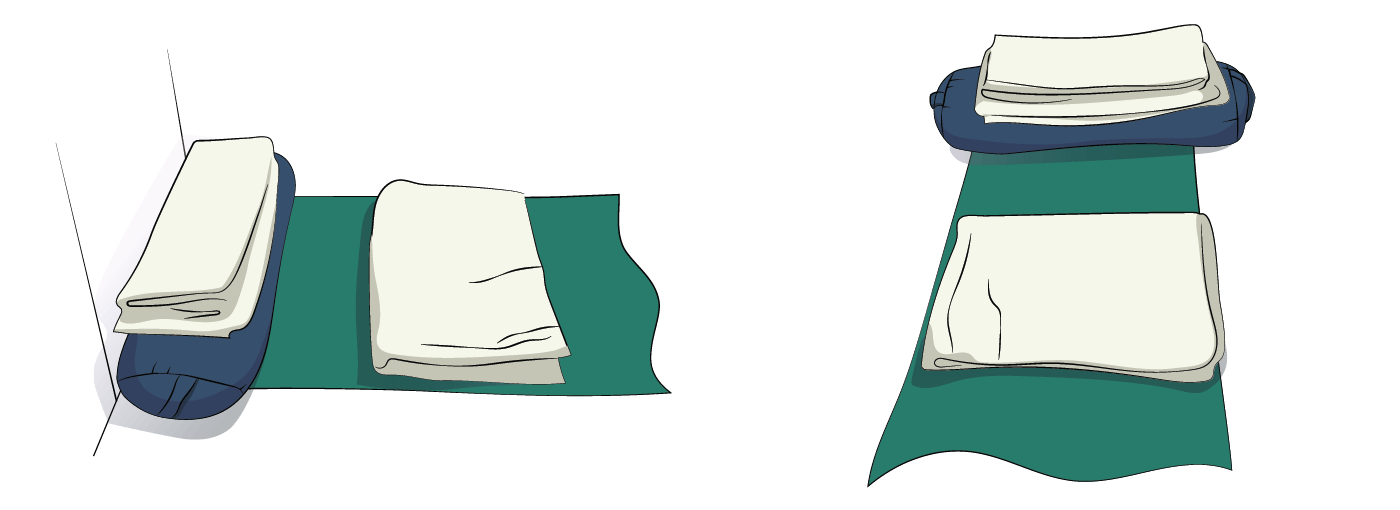
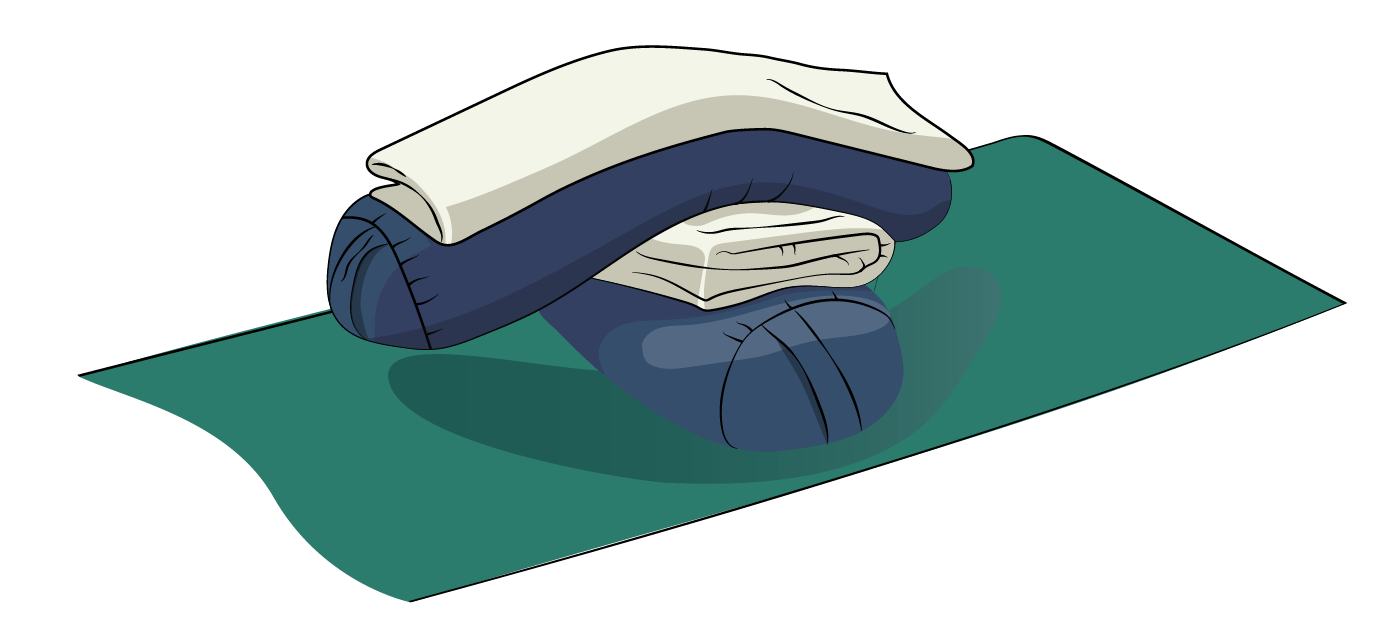
Cross-bolsters
This configuration is often used as an alternative to headstand when not inverting due to injury or menstruation. You can adjust the height according to your body length. It is important that your back and neck are comfortably supported.
Equipment required
- 2 x bolsters
- 3 x blankets (including one for the neck – not pictured)
- 1 x yoga mat
Instructions for props
Place your mat against the wall and put your first bolster parallel to the wall across your mat, about one leg-length away from the wall.
Place a half-fold blanket across the top of bolster 1. Place your second bolster perpendicular to the wall, straddling the first bolster like a see-saw.
Place another half-fold blanket on top of bolster 2. If you are very tall you may need an extra blanket to give more height. You can place this on top of bolster 1 or bolster 2. The third blanket (not pictured) will be used as a folded support for the back of the neck.
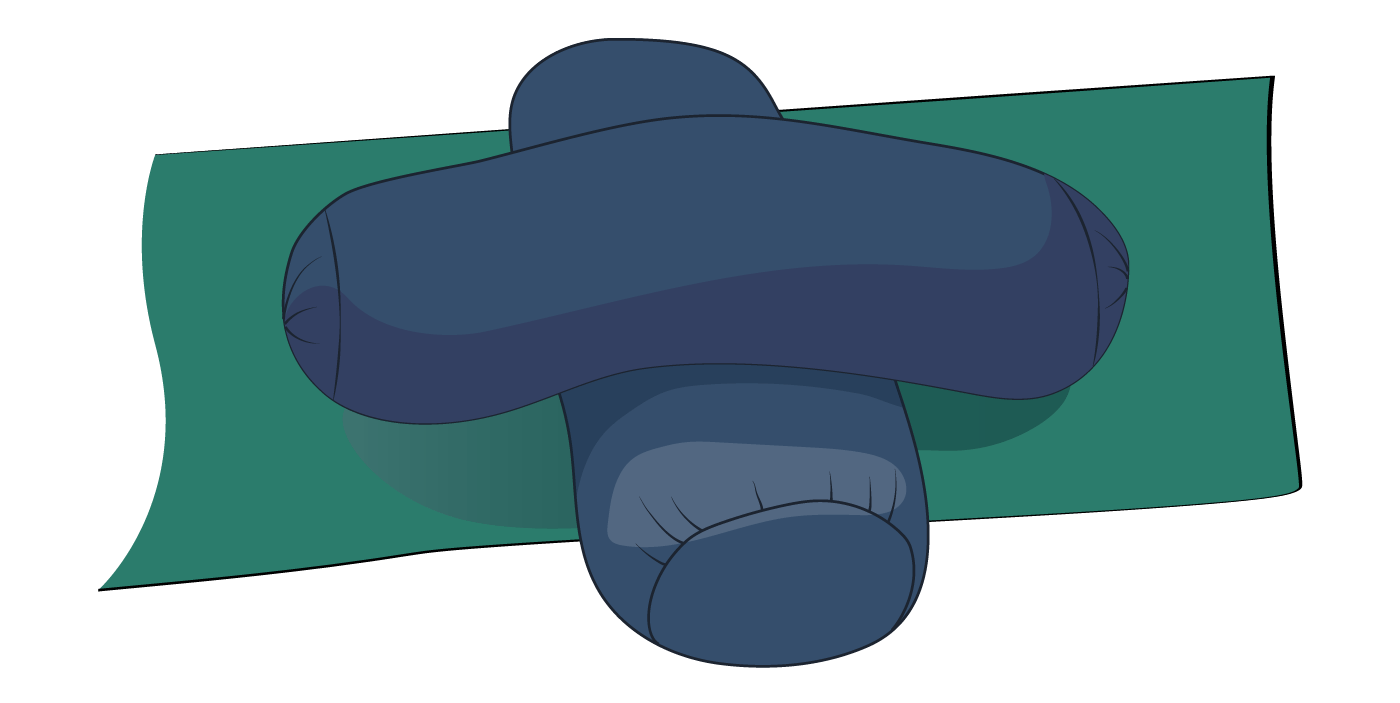
A simpler variation of cross-bolsters
This configuration offers a lower-support and simpler set-up for cross bolsters. The back of your neck will rest against the short edge of the top bolster, thereby eliminating the need for extra blankets.
Equipment required
- 2 x bolsters
- 1 x mat
Instructions for props
Place your mat against the wall and put your first bolster parallel to the wall across your mat, about one leg-length away from the wall.
Place your second bolster perpendicular to the wall, straddling the first bolster like a see-saw.
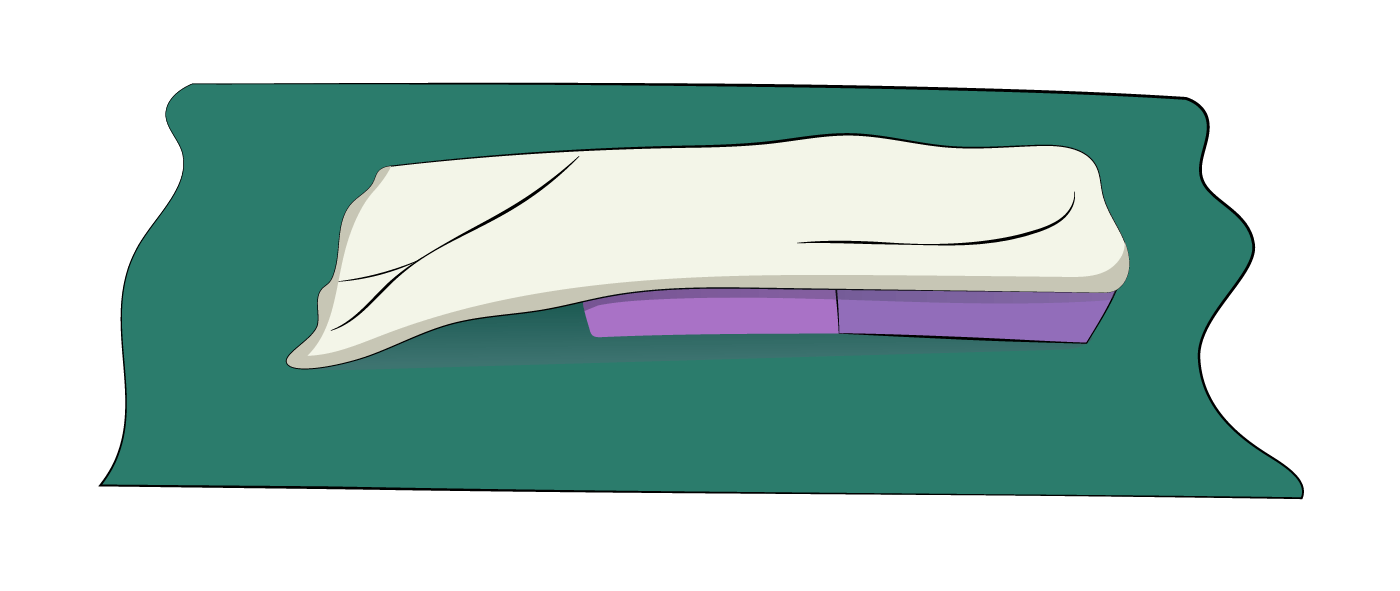
Setu Bandha with T-shape bolsters
This set up is used for a less elevated and comfortable, supported Setu Bandha. The lower bolster height and the support for the feet from the second bolster against the wall allow the feet to spread wider apart whilst still maintaining support. This is particularly useful during the menstrual cycle.
Equipment required
- 2 x bolsters
- 1 x blanket
- 1 x mat
Instructions for props
Place your mat against the wall and put one bolster parallel to the wall, and pushing hard up against it. Place the second bolster in the centre of your mat, perpendicular to the wall against the first bolster which forms the T-shape.
Place your blanket as required to support the neck and head at the other end of your mat, within reach so that you may adjust it once you are in the pose.
More conventional, supported Setu Bandha
This configuration is used when we want to bring more lift for the side chest and a fuller extension for the abdominal area.
Equipment required
- 1 x bolsters
- 3-4 x blankets
- 1 x mat
Instructions for props
Place your mat against the wall. Position your bolster perpendicular to the wall. The distance from the wall will need to be adjusted according to your height.
Place 2-3 half-fold blankets on top of your bolster, with the shorter edge of the blankets in line with the edge of the bolster furthest from the wall.
Place one more shoulder-stand-fold blanket on the floor. This will give height under the neck and head. You may need to double the fold of the blanket if the neck is hanging backwards.
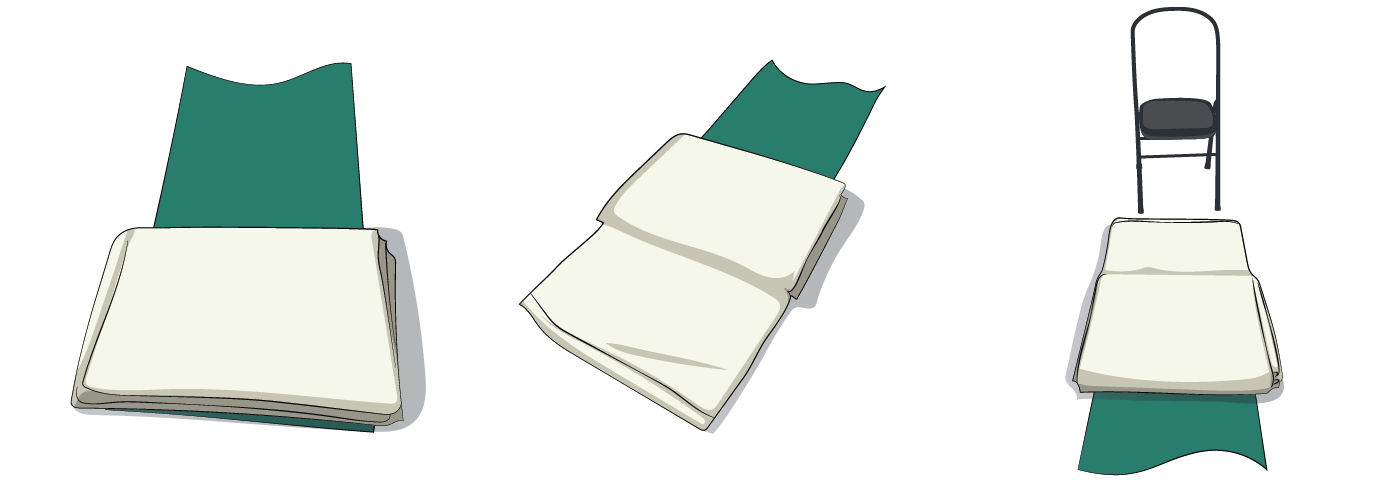
Sarvangasana (Shoulder Stand) with chair support for Halasana
This configuration for shoulder stand aims at using a chair to support the feet when there is not yet enough flexibility to take the feet to the floor. We work with 4 blankets but you will need to adjust according to the lift of your shoulder blades and back.
Equipment required
- 3-4 x blankets
- 1 x mat
- 1 x chair
Instructions for props
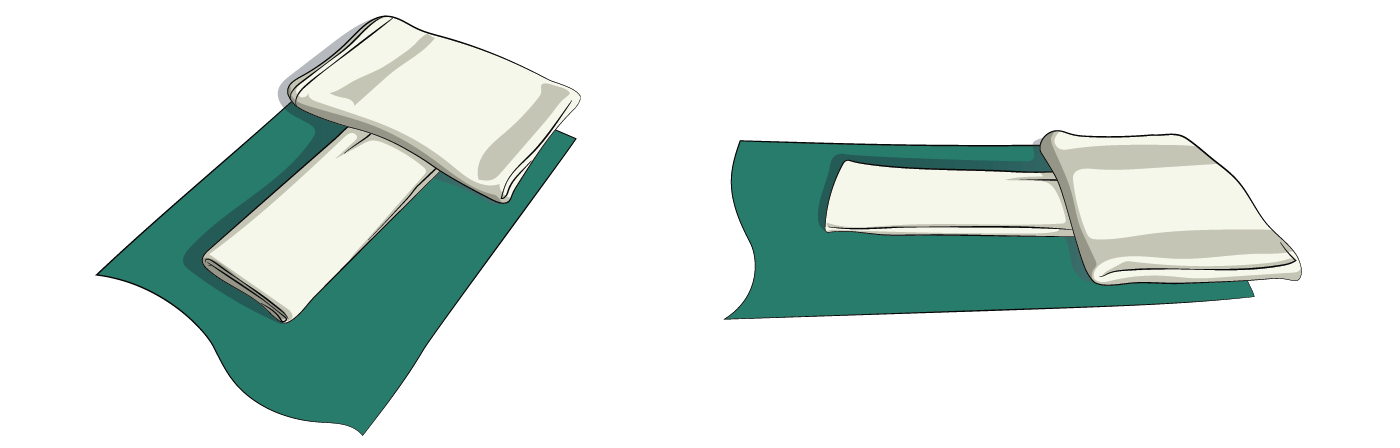
Place your mat on the floor, some distance away from the wall. Take 3-4 blankets in the Shoulderstand fold to one end of the mat. Make sure that the blankets are neatly stacked, one over the other, with the neat end facing away from the mat.
With the top blanket, unfold it once so that half of the blanket sits on the uncovered floor and half remains on the blanket stack.
How to position the chair: when lying on your back, with your shoulders positioned about 3 fingers away from the blanket edge, you should be able to reach the arms over and find the bottom of the front legs of the chair without bending your arms.
Video instruction
View our video explainer for Sarvangasana here on Yoga Vastu.
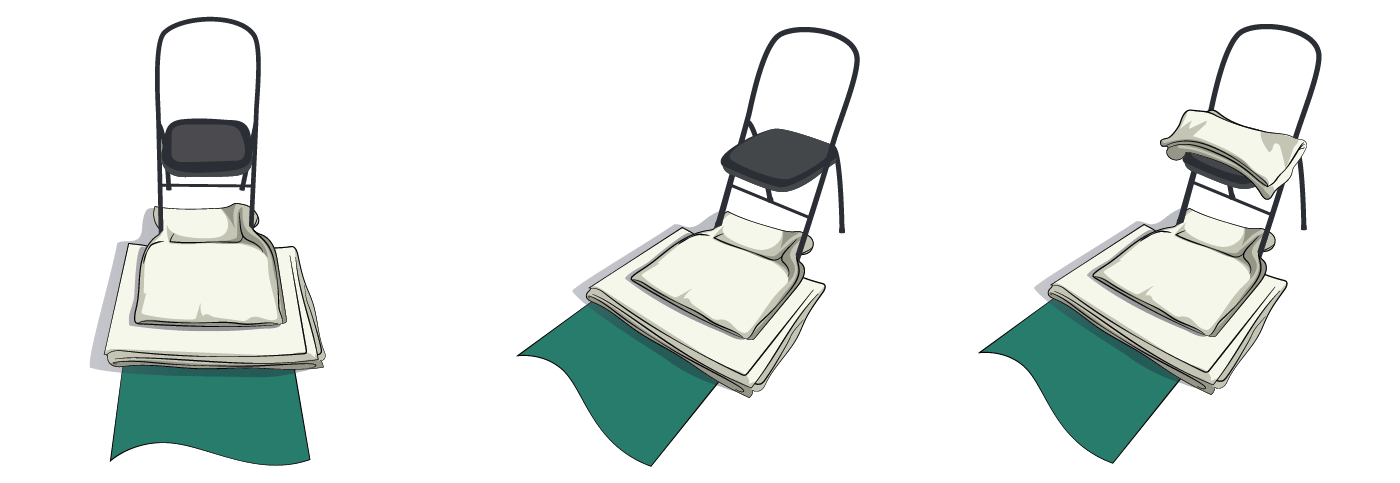
Half Halasana with full support for the thighs
This set-up is used when we want to use a fuller support for the legs in Half Halasana to allow for a more restful and back-releasing Halasana.
Equipment required
-
- 3-4 x blankets
- 1 x mat
- 1 x chair
Instructions for props
Set your mat and blankets up as for Sarvangasana. In this pose, however, we will take the top blanket and turn it 90 degrees instead of unfolding it as in Sarvangasana. Half of this top blanket should be on the 3-blanket stack, and the other half will sit underneath the chair, between the two chair legs.
Here the legs will fit through the back of the chair, with the full thigh resting on the chair seat.
You may need one or more blankets to add height to the chair. The aim here is to have full support for the front thigh up to the pelvis.
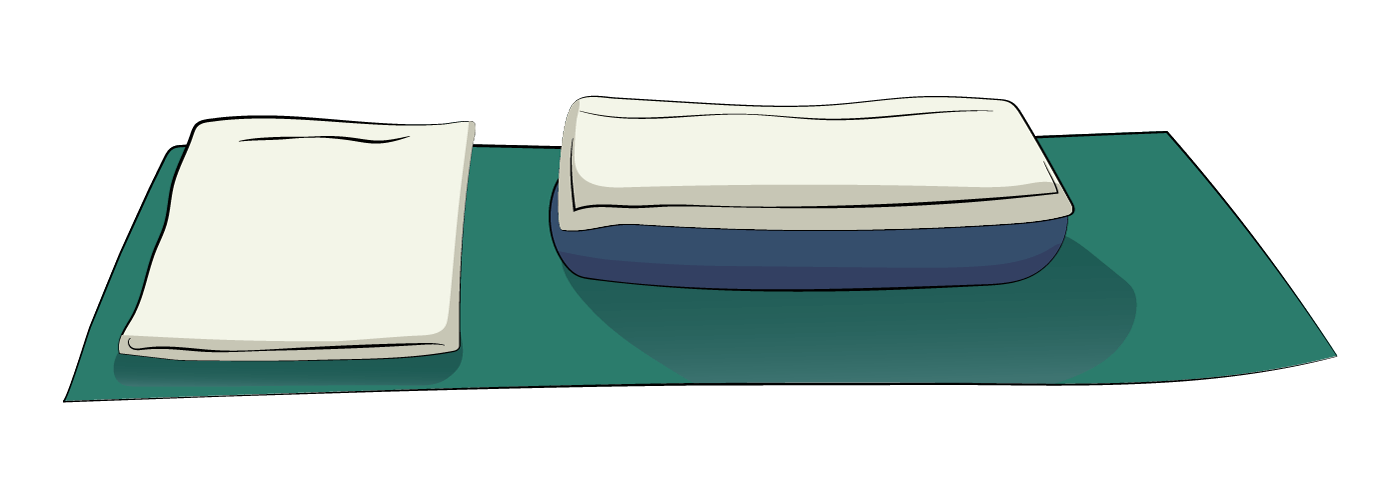
Blanket configurations for Pranayama in Iyengar yoga
For some time in the beginning, Pranayama is practiced in a supine, supported position. You will find below some of the most commonly used supports when setting up for Pranayama.
The bulk of the description here applies to the bottom blanket, as the head blanket will vary according to each person’s needs. It is important that the head is not tilting backwards towards the floor but is at least in line with the shoulders, or tilting slightly towards the chest.
Alan Goode has a wonderful 8-part Pranayama audio series available here on Yoga Vastu. Click here to view it.
Supine Pranayama with 3-fold blanket support
A simple 3 fold blanket, lengthways along the spine is used to give a lift to the spine and side chest. Being the more narrow version of support, this provides a slightly sharper and energising support for Pranayama.
Equipment required
- 2 x blankets
- 1 x mat
Instructions for props
The front of the bottom blanket (the edge furthest away from the head support) may be placed either into the lumbar spine, at the bottom edge of the rib-cage or just under the shoulder blades. Each of these 3 placements will give a slightly different lift to the back of the body. The bottom blanket will always follow the length of the spine (or as they say in Pune, ‘Spinewise’!)
Supine Pranayama with 2 half-fold blankets for support
Equipment required
- 3 x blankets
- 1 x mat
Instructions for props
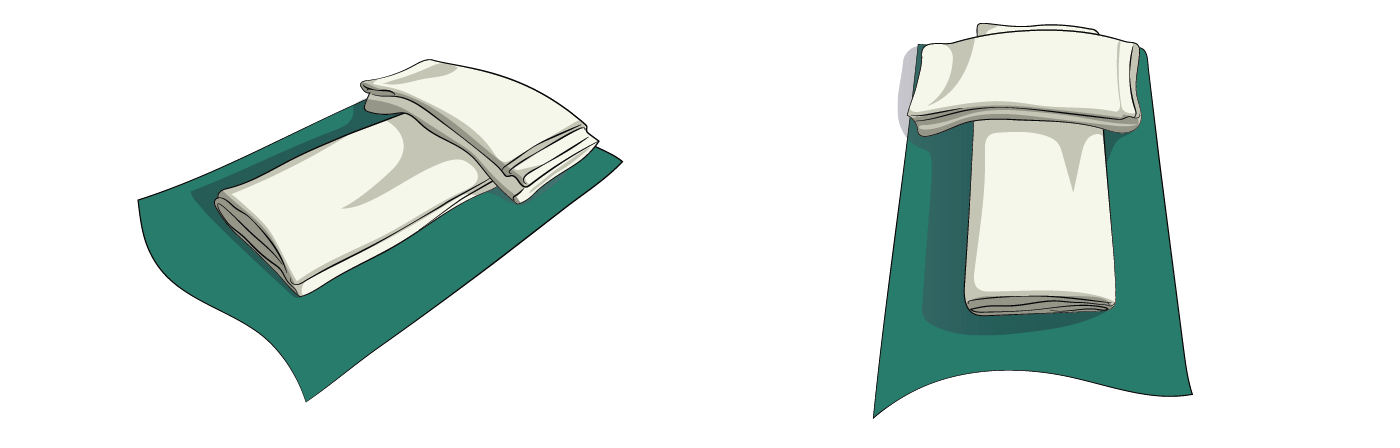
We start with 3 blankets. Put one aside. Take two blankets, and fold them in half lengthways.
Take these two half-fold blankets and place one directly on top of the other. The ends should perfectly line up with each other.
Take the third blanket, and fold it to your needs for head support. Make sure that the blanket supports the whole back of the neck and skull.
The half-fold blankets offer a wider support for the rib-cage whilst still giving a lift to the side of the chest and spine. This wider support is often a little more restful for the back muscles.
Supine Pranayama with 2 staggered, half-fold blankets for support
Equipment required
- 3 x blankets
- 1 x mat
Instructions for props
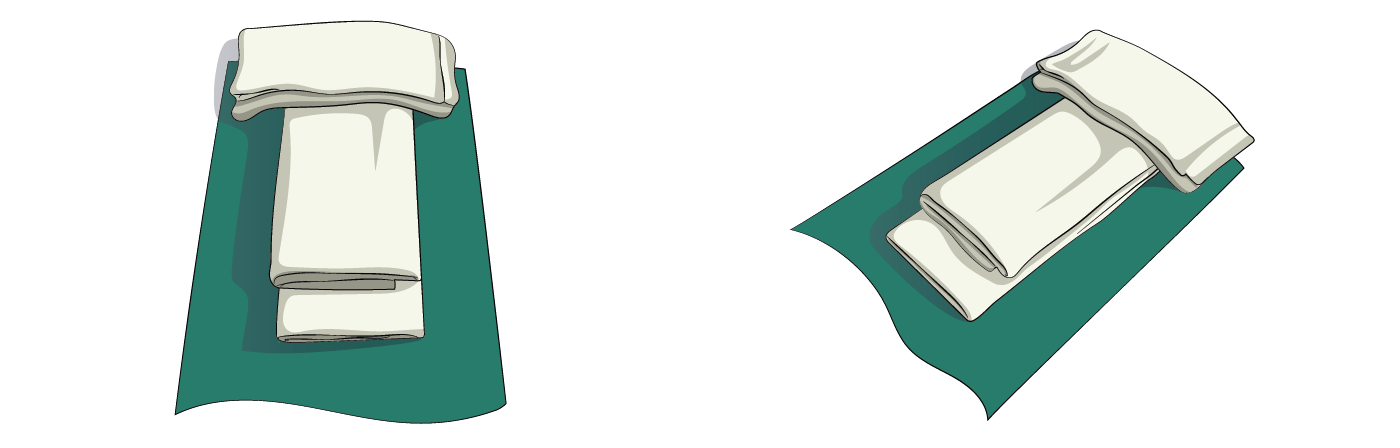
We start with 3 blankets. Put one aside. Take two blankets, and fold them in half lengthways.
Take one half-fold blanket place it following the length of your mat. Take the second blanket and place it on top of the first, staggered approximately one hands’ width back from the front edge of the bottom blanket.
Take the third blanket, and fold it to your needs for head support. Make sure that the blanket supports the whole back of the neck and skull.
This staggered set-up provides support for two sections of the back simultaneously. This brings our attention specifically to the key areas of the back that we want to focus on and engage.
Where to buy
Our favourite place for good quality equipment is iYogaProps (iyogaprops.com.au). The quality is very high and they offer worldwide shipping. We supply equipment from iYogaProps to students at our physical studio and we use it ourselves for home practice.
Premium subscribers to Yoga Vastu get a special discounted rate on all iYogaProps equipment.
Share