Introduction
A potter needs clay and a wheel to make different designs of pots. A sculptor needs a hammer and chisel to sculpt a figure. Iyengar needs his body consciousness as a hammer and intelligence as a chisel to chisel his body to bring a perfect design in each asana to reach its zenith.
About this Manual
Whom is it for?
This manual is intended for the experienced and regular practitioner of Iyengar yoga who is interested in deepening their practice.
Beginners in Iyengar yoga should seek the guidance of a Certified Iyengar Yoga Teacher, Light on Yoga, A Gem for Women and The Preliminary Course Booklet to master the basics and lay the foundation for success before continuing to more advanced subjects.
What is its purpose?
This lab manual presents in a logical order various modes of practice to train the student to learn the art and science of self study (svadhyaya) and become more profound in the practice of yoga.
In the first stage of yoga the student learns the names of the asanas and the proper technique to perform them from his teacher or book. His struggle is a struggle to “do” the asana to “do more asanas.” He feels accomplishment when the number of asanas he can do increases or when his ability to stay in an asana increases. His concept of progress is quantitative. At this stage the student’s knowledge of the asanas is a borrowed knowledge gleaned almost entirely from his teacher or from books. Fortunately or unfortunately, this stage may often go on for years and decades due to the caliber of the student or his teacher and not understanding the nature of progress in yoga.
Once the student has attained some proficiency in the basic asanas, it is time to start learning how to “study” and not mere practice to “do” asanas. It is for this purpose that this manuals has been brought forth.
How is it organized?
The asanas below are sequentially arranged from gross movement (stula) to subtle movements (sukshma). If attempted in the order that they are presented, you will find that your mind is gradually brought in manageable stages from quantitative to qualitative practice, moving inwards from the external to the internal, from the gross to the subtle, the concrete to the abstract, the mundane to the mystical and from the skin to the Self within. This gradual “peeping in” and bringing one light by the quality of intelligence progressively into the dark recesses of the inner body is one of the hallmarks of Iyengar’s brilliant teaching.
How was it created?
Bits and pieces of information from newspaper clippings, books, articles, audio cassettes, video tapes and interviews have been carefully collected, compared and arranged chronologically in an attempt to find the earliest reference for each type of teaching. Some teachings have a definite date associated with them when they were first taught. For example, the panchamahabhutas were first presented at the 75th birthday teachings in Panchagani, India in December of 1992. However, the exact origin for some other teachings are more nebulous in their beginnings. Still, it has been possible to construct a reasonable time line of the evolution of Iyengar’s teaching from what we have available.
How do I use it?
The asanas in this manual are given as examples of a particular way to study one’s self. The student should extrapolate the movements to all other asanas. Thus it may take many months of practice to thoroughly work through a single motion. Extrapolation on your part is crucial to master the basic principle of asana in totality.
Evolution of Iyengar Yoga
Purpose of the time line
Before proceeding to the asanas, it may be instructive to get a clear idea of what lies ahead. While it is not possible to exactly trace the order of Iyengar’s discoveries during his own practice in his early days, it is possible to, more or less, trace the chronology of what Iyengar teaches and practices.
It is possible to grasp from the time line that earlier teachings were more rudimentary than later teachings. This makes sense because yoga was known to very few. Yoga was not only unknown in the East but also in the West before Iyengar, so he had to start from scratch and build up his students until they were ready for deeper penetrations into the subject. This took decades.
One can also see from both the time line and the asanas that certain concepts naturally evolved into other concepts. For example, the use of the skin to give feedback for right positioning eventually evolved into the container and content concept.
Some basic concepts were also expressed over and over again using the language of the day to catch the imagination and zeitgeist of the people at that time or to make the subject more understandable by shining a light on it from various angles.
It is also possible to appreciate from the dates on the time line that the unfoldment of Iyengar yoga has been and continues to be a living dynamic art, science, and philosophy, and not a dead subject. New teachings are coming out even now!
The time line
Sense of direction
- Chackras – Rishkesh
- Panchamahabhutas – December of 1992. 75th birthday celebrations in Panchagani, India
- Antaratma Sadhana – December of 2003. 85th birthday celebrations in Pune, India
Modes of Study
Practice to Study
When one is ready to “study,” it is beneficial to spend many hours at a stretch on a single asana. However, one a week’s time one should still practice all the various groups of asanas so as not to backslide.
There are 3 afternoon practice times set aside each week for the sole purpose of “studying.” During this time, you can study in different ways or modes. Then study how and what to compliment or supplement from various asanas into one chosen asana on a day, and to find these accessories to adopt and adapt to other asanas. Next day what to add and what to subtract requires analysis and synthesis in thinking and acting in motions and action.
Visual-comparative study
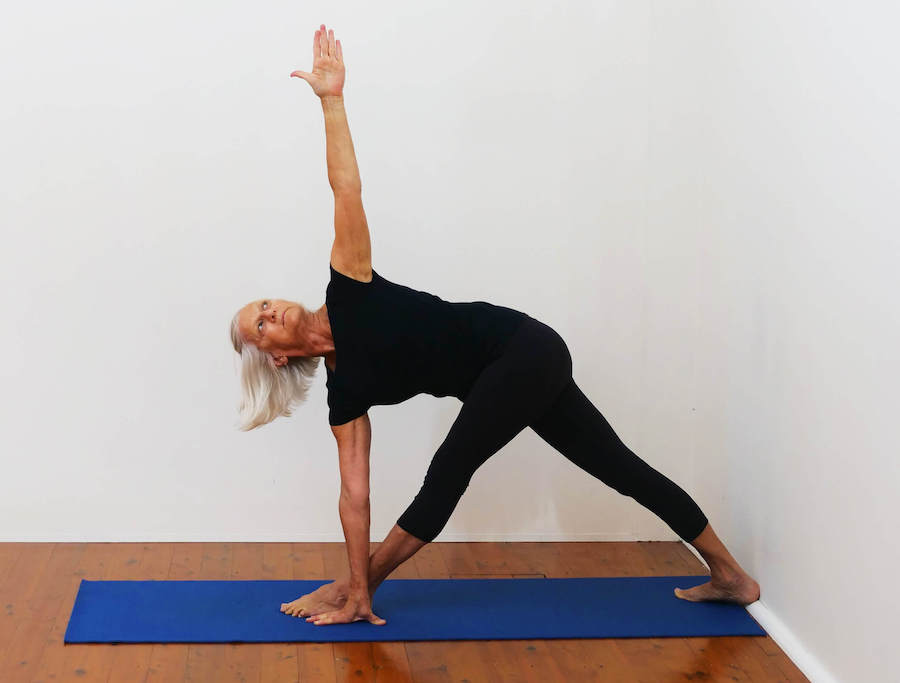
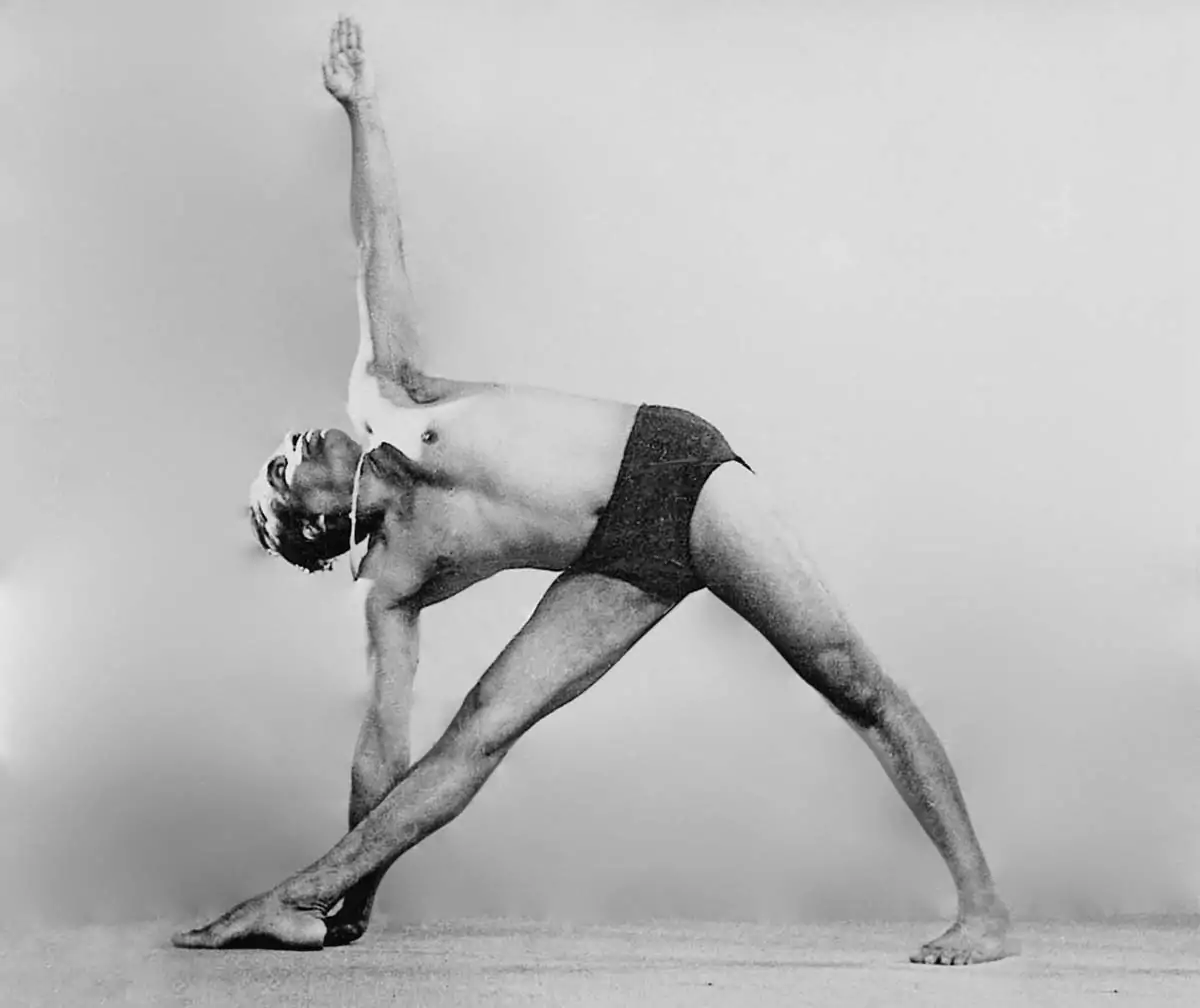
In visual comparative study you can have a friend take a photograph of yourself in an asana and then compare your photograph to Iyengar’s photograph. Be sure to take your photo from the same angle as in Light on Yoga and Art of Yoga for a better comparison. Let us say you are comparing Utthita Trikonasana. Begin with comparing the gross points:
Positioning of the pose: are your legs, arms, trunk straight like his? Look from the gross to the subtle.
Feeling-comparative study
In Light on Yoga, you will find an “effects” section after each asana is described. Practice the pose and compare the feeling you are getting in the pose to the feeling that he says you should be getting. If he says, for example, that you should feel “exhilarated” after a stay in this pose and instead you feel exhausted then you can assume that you have either not observed and caught the right points, are not toned enough for the pose or you have not struck the pose as he has. You should then go back to the simpler asanas akin to the one that did not come as anticipated, search, trace and find out “why” and “where” you are ignorant in the body getting exhausted instead of “exhilarated.”
Stages of Practice
- Mrdu Sadhana (feeble) or Tapas. Practicing at the level of the muscles himsa klesha vrtti (I have this problem or that problem and I get rid of those things)
- Madhya Sadhana (average) or Svadhyaya. Practicing at the level of the skin and senses ahimsa (kayu vrtti the mind gets adjusted. Psycho-physical standard)
- Adhimatratvat Sadhana (keen) or Isvara Pranadhana. Practicing at the level of the architectural icons. The seeds of imperfection in the dosha (defects) are removed.
Even in these three stages of sadhana, the sadhaka may be mrdu mrdu, mrdu Madhya or mrdu tivra, or the same in 2 & 3. These 9 steps of sadhana may further be subdivided like mrdu, mrdu, mrdu; mrdu, mrdu madhya; or mrdu, mrdu, tivra and so forth.
Stages of Evolution
Iyengar had to work out the entire system of Yoga to uncover its full potency and meaning which had been lost. The system came to him over a long period of time through the combining together of his devoted study, intuition and analysis. His revelations came in a particular order which if we trace ourselves we may improve in a systematic way.
Sequencing
Iyengar’s guru Krishnamacharya in his last 7 1/2 years studied sikshana krama and chikitsa krama under his Guru Rama Mohana Brmachari. At the royal palace, Krishnamacharya taught all asanas in the vinyasa krama – where one posture followed another in a logical sequence. Krishnamacharya divided the practice of yoga into three stages:
- Shakti Krama – to develop muscular power, concentration & difficult postures
- Adhyatmik Krama – to go beyond the physical to understand God or oneself
- Chikitsa Krama – yoga for therapy where breathing is given paramount importance and every body movement was accompanied by an appropriate breath in such a way that every asana practice included the union of the body, breath and mind.
Action versus Motion
Robust health came to Iyengar only in 1954. By robust health, he means that his body could withstand any type of strain. By then, he was practicing ten hours a day!
“I am teaching you how I learned to see myself,” he says, “and I am also training you how to see yourselves.”
Weight distribution of weight in the pose, which led to:
- Panchamahabhutas and
- Pancha Pranas and then
- Chakras
Practical Study
Bhairanga Sadhana
Action versus Motion
As Iyengar explains it, the Western notion of exercise is motion. One practices a move until the body does it automatically and the mind is no longer involved. In yoga, however, “after moving into the posture, you have to feel how you are holding it, how you are stretching,” he explains. “In that way, tremendous reasoning is developed. You use your intelligence, your judgement. In motion, there is no judgement.”
Median Plane
He [Iyengar] sweated and toiled in the privacy of his room, his common sense guiding him in pursuit of excellence. There were very few books on yoga then and therefore he tried ingenious methods to perfect his postures. “I would draw medians running along the body and try to match that,” he says proudly.
Sense of Direction in Asana
- Upakrama – Going into the asana
- Sthiti – Staying in the asana
- Upasamvara – Coming out of the asana
Extension & Expansion
Extension is vertical elongation (or elongation along the axis of the bones). Expansion is horizontal widening (or widening perpendicular to the axis of the bones). The fibers of the body have to be extended and expanded proportionately so that extension and expansion meet exactly in the middle.
Extension & Expansion Exercise
Do Uttanasana and as you elongate the back of the legs also widen them a corresponding amount. Try different amounts of widening of the back legs keeping the elongation the same. Then try different amounts of elongation of the back leg keeping the widening the same. Observe what proportion of extension and expansion brings the mind to be exactly in the middle.
Conative & Cognitive Exercise:
One asana in many asanas and many asanas in one asana
One asana in many asanas:
An action from one asana is often found in many other asanas. this is one asana in many asanas. For instance, the way the inner frontal heel should poke out which can be felt and learnt easily in Ardha Matsyendrasana 1 and Upavista Konasana also exists in many other asanas where it is more difficult to do such as Tadasana, Paschimottanasana and Sirsasana, etc.
Many asanas in one asana:
Each asana is composed of many actions which are found in other asanas. When certain actions from different poses are combined, they form a new pose. This is many asanas in one asana. For instance, Ardha Matsyendrasana 1 is a combination of Marichyasana 1 (first part) and Bharadvajasana 1. The four corners of the chest and the deltoid rolling back action of Bharadvajasana 1 plus the hips sucking in action of Marichyasana 1 (first part) combine together to make Ardha Matsyendrasana 1.
Radial Point Exercise:
One asana in many asanas and many asanas in one asana Exercise:
One asana in many asanas exercise:
Take the inner frontal heel poking action found in Upavista Konasana & Ardha Matsyendrasana 1 above and do all the other poses you are able to do in order to see which of them this action is in. Go on finding other actions in this and other poses and repeat this exercise with those actions.
Notice that in some poses prakriti (nature) helps you (i.e. it is easier) to poke out the inner heel but in other poses, it hinders you (i.e. it is more difficult). Realizing this should suggest to you that it is easier to first learn the action in poses where nature is helping you and then to proceed to tame the nature in those poses where their nature is antagonizing you. This is how prakriti plays with us and how we can gradually learn to tame prakriti and bring it under our control.
Many asanas in one asana exercise:
Take one asana e.g. Parivrtta Parsvakonasana and try to find out what other asanas are in this one asana. Ask yourself “in what other poses is my front foot like this? root of the front thigh like this? belly like this? back thigh like this? top arm like this?” Once you have some ideas, test them by doing those poses to compare and see if they are in Parivrtta Parsvakonasana or not. Do this exercise with all the other poses you can do.
Brain of the Pose
The brain of the pose is that point where the entire pose comes by itself if you work there. In Pinchamayurasana it is a point on the frontal armpit chest. If you lift that point parallel to and in line with the same point on the back then the whole pose comes by itself. You feel that the forearms go down, the side chest lifts, the chest opens, the mind gets stabilized, etc.
Source of Action
The source of action is the point from which the action is involuntarily initiated. You can find the source of any action by beginning to enter the pose while feeling from what point the action first started on its own. When looking for the source of action, feel for which sensory fibers quickly act on their own as you enter the pose before the motor fibers get involved. Do not stay in the pose long when looking for the source of action but instead catch that initial quick action of the sensory fibers on the way into the pose. Another way to tell the source of action is that if you keep that part from acting it will be impossible to go into the pose. The source of action is important because it is from that point that the action must spread.
In motion, there is mobility in body and intelligence. In action, both body and intelligence are kept steady and stable without jarring the end of the motor nerves and sensory nerves. They are made to unite like the lover and beloved or beloved and a lover.

This point is the karana sarira or causal body for that action since it is the “cause” for the rest of the action. For instance, in Bhekasana, as the shin is raised from the floor the belly of the hamstring muscle gets contracted and shortened compared to the quadriceps. What is the cause for this? The cause or reason for the hamstring becoming unduly short and contracted is that the source point for the action (the knee ligaments) gets contracted (There is also another source point at the tailbone and bottom buttock). The source point is the controller for the rest of the muscle so if it becomes contracted, so will the rest of the muscle. For this reason, it is very important to find the source points of action and to control them for the right action.
Why does the source of action get contracted? The source of action gets contracted when the energy of the contraction moves before or faster than the actual movement. The energy of the contraction and the actual movement have to be synchronized to avoid a contracted muscle. When they synchronize this is extension in contraction – a purely yogic form of movement.
Another way to find the source of action is to do the action and observe in that split second of initiation where there is a momentary feeling of “I” ness. In that split second when the movement is initiated, your attention will be brought to some exact point where the feeling of “I” momentarily surfaces. That exact point is the source of action and becomes the karana sarira for that muscle.
Another way to look at this is from the point of view of the panchamahabhutas or 5 elements of earth, water, fire, air, and ether. Ether, or space, has the power to both expand and contract. When we begin to flex the knee for Bhekasana the ether contracts at the source point (knee ligaments) to begin the movement. So the ether element becomes predominant and contracts at the source point (knee ligaments). If we put the rope in the back of the knee and apply the proper pressure in the right direction, then we induce the earth element to surface in that area to stabilize and keep the source point from having contracted ether. The rope induces the earth element to surface at the source point and control the ether from contracting faster than the movement. Thus the entire muscle is controlled and kept from becoming short as it contracts. That is why the ropes are given for the knee patients.
Within each cell, we have to see what element is surfacing, what it is doing, what element is needed there, and for what purpose. Understanding this is the beginning of control over the pancha maha bhutas.
The pancha vayus. Prana represents water, apana: earth, samana: fire, udana: air, vyana: vyana: ether. Earth is anamayakosha, water is organic body, fire: mind, air: intelligence, and ether : space and sound.
Source of Action Exercise #1
Observe your legs as you enter Adho Mukha Svanasana. Watch for which sensory fibers act quickly on their own, are sharp, and move deeply into the body as you begin to take the legs into the pose. Do not stay in the pose but instead repeat entering the pose several times until it flashes in your consciousness where the source of action is. If nothing flashes, then compare the speed, sharpness, and depth of penetration of the front of the upper leg skin to the speed, sharpness, and depth of penetration of the front of the lower leg skin as you enter the pose. You should definitely notice a difference between these two. Where you observe that the speed, sharpness, and depth of the sensory fibers going into the body is very slow, dull & far away from the bone, that area you can eliminate and concentrate only on the area where you feel that there was better speed, more sharpness and depth of the sensory fibers going into the body. Continue the process of elimination by dividing the lower leg into front & back, top half & bottom half, inside & outside, etc so that you narrow down the region more and more until you arrive at the exact location. For those who want to confirm the place look in the footnote.
Now find the source of action for the arms by the same process. You can do this for all the asanas that are in your ability.
Source of Action Exercise #2
Each pose has its secret place to move from. Sometimes it is the skin, sometimes the flesh, sometimes the ligament, sometimes the bone.
Try different poses that are in your capacity and find in which ones the source is from the skin, flesh, ligament, and bone. Compare and contrast.
Comparative Length
The lengths of the front and back or inner edge and outer edge of the limbs or trunk should often be the same length. In all poses compare and you will find that there is often a discrepancy in the lengths. Work to correct this so as to make the two sides equally long. For instance, you will notice the the inner legs tend to be shorter than the outer legs in Tadasana, Paschimottanasana, Sirsasana, Sarvangasana, and Trikonasana but not so much in Upavista Konasana. The frontal legs tend to be longer in Sirsasana but shorter in Sarvangasana. The outer legs become active and firm and the inner leg remains dull in Sirsasana while in Sarvangasana it is the opposite.
Comparative Length Exercise #1
On the front leg of Parivrtta Trikonasana, compare the length of inner and outer legs. Which is long and which short? Compare the same on the back leg. Now try to correct and observe the effect. Do the same comparison then correction of the inner and outer legs with observation moving the legs equidistance to feel the equal length of intelligence spreading and energy flowing without deviation of the effects in all the poses you can do. Then do the same in all poses with the frontal and back legs. Now do inner and outer arms; front and back arms; right and left sides of the trunk; front and back of the trunk. This may take some time.
Comparative Length Exercise #2
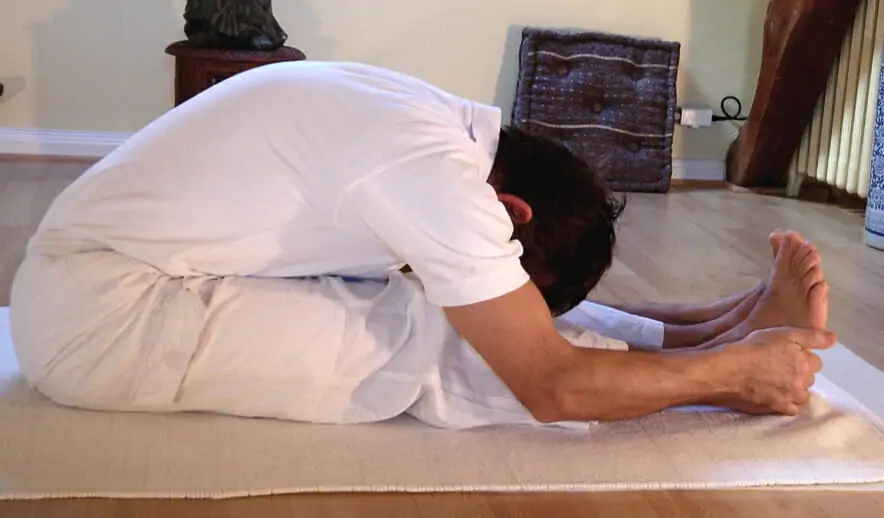
Stand in Tadasana. Take a strap and put it tight against the front of your body between the pubis and the sternum to measure the length between them. Now bend forward in Uttanasana holding the strap in place. Notice what happens to the strap? Now do again trying to keep the strap the same length as when standing in Tadasana.
Comparative Length Exercise #3
This is a refinement as the lengths observed will be smaller parts as opposed to the larger parts observed above. Do Adho Mukha Svanasana and observe the length of the inner and outer edges of each of the fingers. Correct and differences. do the same for the tops and bottoms of all the fingers. Do the same for the inner/outer & top bottom toes.
Comparative Length Exercise #4
You can make up your own subtler exercise by not only choosing a small part but by choosing a part of the body that is thicker, or more central or interior or on the back body and therefore less easy to penetrate, for example, you could choose to observe and correct the length of the sides of the anterior sacrum in Bharadvajasana 1 while twisting.
If the intelligence touches the peripheral parts of the body from the source point (core of being) to end point (the pores of the skin), it means the finite is thoroughly covered. It means that the finite is thouroughly covered as the finite is covered it means the infinite (the core) assumes the asana and not its vehicles/agents (prakriti, consciousness, mind intelligence (vehicles of the soul). This is the establishment of the soul in asanas. All asanas should be like that.
Bhavana & method
When doing a pose, Bhavana is the “feeling,” sensation or perception that you get from doing that pose. When exploring a pose you should first go for what feeling you are getting on the opposite sides of the same body part and compare them to see if they are the same or different. Once you have that feeling firmly in your mind, you should apply a method to remedy the discrepancies. First observe Bhavana (the feel) then method of adjustment. Then you get the pose. Most of us do method first then we may or may not go for bhavana afterwards, and that is why we don’t get the pose.
Bhavana & method Exercise #1
Do Utthita Parsvakonasana and observe the length of the inner shin & outer shin, inner thigh & outer thigh. Observe that the inner shin & thigh are shorter than the outer shin & thigh. This is the bhavana. Now apply a method to remedy this while watching that bhavana to see if they become evenly long. For instance, you could press the outer heel down, draw the outer thigh from the knee to the hip socket, lift the inner shin up or extend the inner groin towards the knee still more. There are many methods you could apply but they should be done while observing to see if the lengths have been equalized.
Bhavana & method Exercise #2
Again do Utthita Parsvakonasana but this time apply one of the methods above first without getting the bhavana. Then, after doing the method, look for the bhavana. Compare your experience with the one in exercise #1 above.
Back two actions while front single action Back meeting exactly at the spiritual heart in Prasarita Padottanasana.
Circulation of Skin
In asana, the skin can often be found to move in a circle. For example, in the concave spine portion of Prasarita Padottanasana 1, the skin moves forward from the tailbone along the front of the body up to the sternum. Then posterior skin moves from the neck towards the dorsal area while in the front body it is in a single movement from the pelvic bone to the crown of the head. chin then continues to the back of the body where it goes towards the back waist and again to the tailbone. If the student pushes the lumbar too much in the circulation of the skin is broken which can be felt on the back body as the skin of the back and sacrum colliding at the lumbar. It can be felt on the front body as the skin of the lower frontal ribs and pelvis being pulled away from each other over-stretching the belly area. Notice that when the circulation of the skin is maintained, the energy is circulated within the body from the anterior body towards the posterior body; when it is broken, the energy hits out, is dissipated, and creates areas of overstretch on one side of the body and over contraction on the opposite side.
Circulation of Skin Exercise:
Do Prasarita Padottanasana 1 and find which way the skin circulates on the median plane of the legs. Repeat this exercise with all the other poses you can do observing which direction the skin circulates on the median plane. Then repeat and find out which way the skin circulates in the coronal plane.
Skin & Flesh
The skin and flesh often have different jobs to do in an asana. Yoga is done more from the sensory fibers and not so much from the motor fibers. Doing from the motor fibers creates hardness and that is where we all go wrong.
Skin & Flesh Exercise
In Virabhadrasana 1, turn the skin of the front of the back leg from outside in and the skin on the back of that leg from inside out. Do this moving only the skin and not the flesh. After a pause, move the flesh out against the skin.
Antaranga Sadhana
Coordination & Synchronizing
Normally we go into or come out of a pose without observing how our various parts should move in relation to each other at every degree of entering (upakrama), staying (sthiti), or exiting (upasamvara) the pose. In a coordinated pose, we skillfully balance and combine the movement of our various parts at the same time to form a single unit. Striking the exact balance that brings rhythm, smoothness, grace and a unified experience develops judgement, discretion, prudence, and reflection while acting.
Coordination & Synchronizing Exercise 1
Go into Ardha Chandrasana straightening the front leg first then after completely straightening the front leg raise the back leg. Observe the result. Then repeat Ardha Chandrasana but raise the back leg completely first and then straighten the front leg. Observe the result. Lastly, go into Ardha Chandrasana straightening the front leg and raising the back leg at the same time. Observe the result. Straightening and raising the legs together while entering the pose is known as synchronizing in time during the commencement phase. Only when the lifting and straightening of the two legs synchronize do we begin to strike a coordinated pose. This is synchronizing during the commencement phase (upakrama). learn to synchronize as above while coming out of the pose (upasamvara) and also while staying in the pose (sthiti).
If the asana is done by the muscles to work on the bones in Utthita Trikonasana whereas in Ardha Chandrasana is the bones that work first and the muscles adjust as for the correct stretch of the bones and joints.
Coordination & Synchronizing Exercise 2
Go into Utthita Trikonasana and observe the two legs. which leg moves faster than the other leg? Do again and observe the two arms. Which moves faster? Do again and begin to coordinate the pose by making the legs move at the same speed. Repeat and add the arms.
Repeat to the right side and observe with what speed the outer right leg moves backward compared to the back of the left leg. Do again and coordinate these as well.
Coordination & Synchronizing Exercise 3
When going into Virabhadrasana 2 to the right side, move the pit of the left groin towards the floor by taking the bottom hip socket and head of the thigh to touch the inner leg at the same rate that you move the right hamstring towards the back of the right knee. Learn how to smoothly synchronize these two actions in every moment and degree of bending. Here in many the top bent thigh bumps up and remains hard. It means the buttock bone of the bent leg is not brought in line to the back of the bent knee.
Coordination & Synchronizing Exercise 4
Normally going into the pose we are slow and coming out of the pose we are fast so there is no synchronization of entering and coming out of the pose.
Coordination & Synchronizing Exercise 5
When going into Utthita Parsva Konasana, time how many seconds it takes to go from:
- Tadasana to Utthita Hasta Padangusthasana
- Utthita Hasta Padangusthasana to Parsva Hasta Padasana
- Parsva Hasta Padasana to bending the knee
- Bending the knee to taking the hand to the floor
- Taking the hand to the floor to taking the top arm over the head
When you have a sense of how long each step of going into the pose takes, then maintain that same time when reversing the process and coming out of the pose.
Coordination & Synchronizing Exercise 6
Normally going into the pose we are slow and coming out of the pose we are fast so there is no synchronization of entering and coming out of the pose.
While going up into Urdhva Dhanurasana, stretch the inner bottom forearm one inch up towards the elbows while at the same time stretching the corresponding point on the lower shins near the ankles up the same one inch towards the knees. Do not stretch one more and one less but synchronize so that both are extended evenly the same amount at the same time.
In this asana, one has to feel the life force and earth element on the knees. See the feet keeping the knees light.
Coordination & Synchronizing Exercise 7:
To compare and contrast, you can also do asynchronously by stretching first the forearms and then the shins or vice versa while keeping the amount of extension one inch of stretch the same. Remembering the effects on the pose when done synchronously, compare and contrast these effects when done asynchronously.
Developing the Whole
We often fall prey to doing a pose the way that nature allows us to do it. So if we are flexible in the lumbar in Urdhva Dhanurasana then we tend to move from the lumbar to do the pose. To break this habit of following nature (prakriti) instead of reaching the archetypal pose, it is a good idea to try to do the pose from places where we do not normally do the pose from. By making the flexible area “stiff” or resisting in that area and then moving into the pose from some other area which is normally not used, we learn to study ourselves, discriminate various actions and their effects and develop the whole pose.
Developing the Whole Exercise
Lie down to do Urdhva Dhanurasana. Raise up a few times and observe where it is that you tend to go up from the tailbone, lumbar, thoracic, shoulder blades, or shoulders? Let us say that it was the lumbar that you were going up from. Now tell yourself I did previously from the lumbar. Now let me not do from the lumbar i.e. let me resist in the lumbar and let me try to go up from shoulder blades [for example]. Go on learning interactively and interchanging what effects come from doing the pose from each area.
Ida Pingala & Susumna
In the science of yoga, the Susumna nadi is considered as the median line flanked by Ida nadi on the left and Pingala nadi on the right. Normally these nadis are talked about as though only existing in the spine, but actually they can be used as a guide in every part of the body. For example, you can draw a line down the middle, left, and right sides of each of your 10 fingers, toes, shins, forearms, upper arms, thighs, etc. If we take the middle finger as the center of the hands, a line down its middle would be Susumna and the left and right sides of the finger would be Ida and Pingala. If we take Susumna as a guide that it must be exactly in the middle then the lines drawn on the sides, Ida and Pingala, must also be exactly straight and of the same extension if this is to be accomplished.
Ida, Pingala & Susumna Exercise
If you open your hand and look at your fingers from the palm side you can notice that some fingers or parts of fingers are straight and some fingers or parts are concave on one side and convex on the other side. Feel that the side which is concave and short is not extending to the same degree as the corresponding part on the other side of the finger, which is why the finger is deviating to that side. To make the finger straight, extend more through the short, concave side to match the feeling on the long, convex side until you get the feeling that both are even and the median line of the finger can be felt going straight. In other words, make Ida and Pingala even so that Susumna is straight and the flow of intelligence and energy is even, full, complete and without any obstructions.
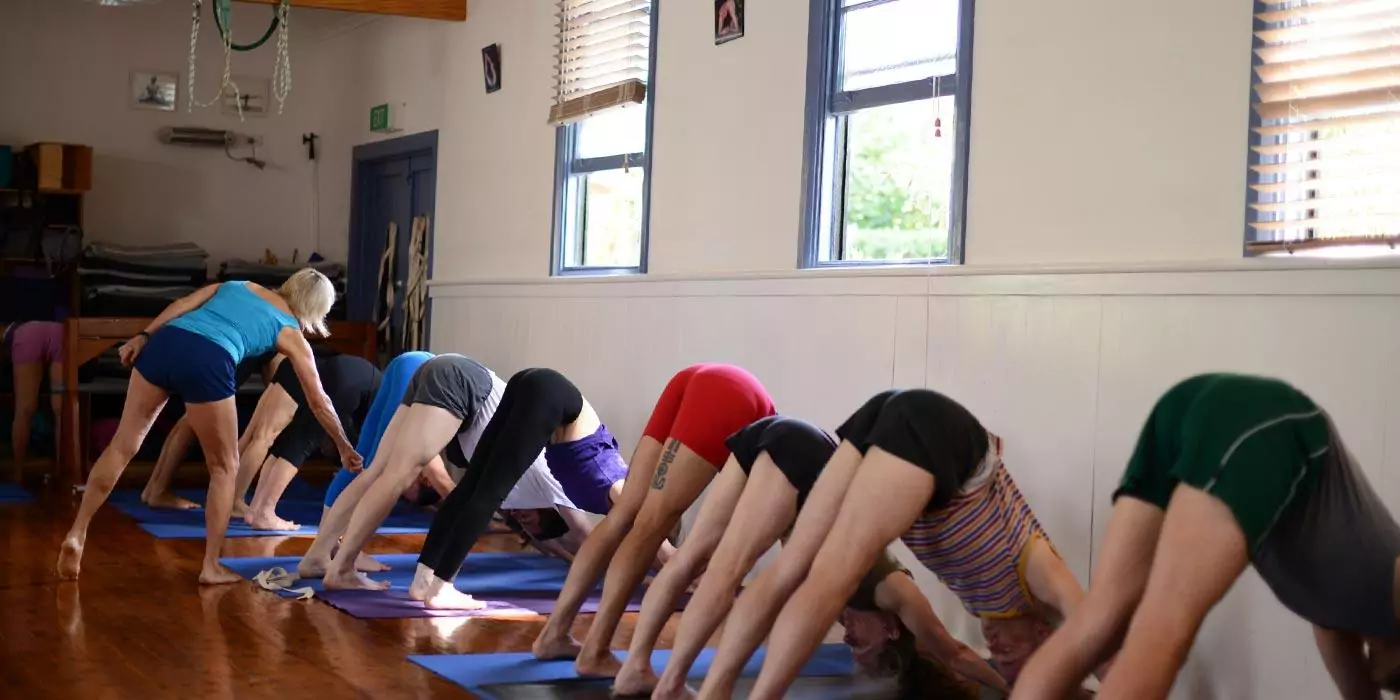
Ida, Pingala & Susumna Exercise #2:
Now keeping the Ida, Pingala, and Susumna running evenly on all the 10 fingers, do Adho Mukha Svanasana maintaining that evenness. Observe the difference in the flow of intelligence and energy in the fingers, hands, and even the effect on the lower and upper arms.
Ida, Pingala & Susumna Exercise #2:
Do Adho Mukha Svanasana as above but now make Ida, Pingala, and Susumna run straight in the toes, feet, forearms, thighs, upper arms, trunk, etc. Observe the effect as above.
Psycho & Soma
The psycho is dormant in the soma so you have to “tap” it to make it flow. The places where psycho is dormant can sometimes be seen as “dents” in the body. Those dents are areas of unawareness where psycho sleeps waiting to be tapped by the sadhaka.
Psycho & Soma Exercise:
In Sirsasana see which leg is perfectly in contact with the psycho and which part of the other leg is not in contact with the psycho. If you look at your two legs of Sirsasana in a mirror, you will see that one leg is straight and the other is tilted. The intellectual flow will not be there in that tilted leg because the flow of energy is not there. But the moment you do the Sirsasana of the dome shape, the energy flows so intelligence comes immediately in communion with to energy that is flowing which adjusts the soma. You don’t adjust the psycho, Soma adjusts because psycho tells you that I am wrong here, I am right here.
Architectural Icons
It is not hard to make out that certain poses are architectural forms:
- Utthita Trikonasana – triangular shape,
- Parsvakonasana – angular shape
- Urdhva Dhanurasana – dome shape
Also within the poses there are architectural forms. E.g. in Salamba Sirsasana the upper arm has a dome shape. You have to divide the flesh and the skin exactly in the middle to get the dome shape. Also, Utthita Trikonasana has many smaller triangles in it etc.
A yogi can meditate in these icons be they triangles, angles, or arches.
Harmony
This is how Iyengar started delving into the inner body in Pune in 1937. He began to think of “harmony.” Where was the harmony in the pose? In Uttanasana, why is there so much weight in the buttocks (when leaning back as typical for beginners) and no weight on the frontal legs? So he evolved the pose from what he was taught by bringing the legs to vertical to get the “harmony” or feeling of even weight on the front and back legs.
Harmony Exercise
Do Uttanasana with the legs leaning back and feel how the weight is more in the back legs and accumulates in the buttocks. Now take the legs to vertical and feel how the weight balances/harmonizes between the frontal and back legs.
Perception
At first, we don’t tend to compare and perceive if our right and left sides are doing the same. After learning “what” to do as a beginner, the next step is to learn to compare and perceive the differences in how the two sides of the body are doing the pose.
Perception Exercise
Do Paschimottanasana and observe the fingers of left and right hands. Are they going deep into the arch evenly while holding the feet or is one side going more into the arch and the other side not going so much into the arch? One side the heel pounds down the other side it does not pound down. One side of the inner thigh goes more down the other side it rolls out, one leg extends the other shrinks. Go on comparing the two sides like this starting from the larger grosser parts and moving on to the smaller finer parts.
Note: At this point, it is important that you do not attempt to correct the differences that you observe. For now, just go on observing the differences so that you learn to become continuously sensitive without the jerks and jolts of active corrections. In the next exercise you will learn to correct and trace the effects of both the mistakes and the corrections.
Discrimination
Once we can perceive the differences we have to discriminate the right from the wrong. This is sometimes obvious but sometimes it is not obvious. How does one discriminate the right from the wrong? The right and the wrong are both known by the effects they bring. The right brings the desired yogic effects (rhythm, harmony, balance, flow, absorption, etc.) whereas the wrong does not. If it is not obvious which side is doing better some experimentation will be required in the following exercise. Though discrimination always contains doubt, it is a required step in building up the knowledge which culminates in wisdom. The end of discrimination is the beginning of freedom that choice-less state.
Discrimination Exercise
Do Paschimottanasana as above and now decide for each place (fingers, heels, inner thighs, leg extension, etc.) which side is the side that is doing better in all those various places. Again do not make any adjustments yet, just make your decisions about what you are going to do in the next step. If you can not decide which side is doing better then in the next step each side has to be made to do like the other side and the effects of doing both ways has to be observed and a judgment formed about which is preferable.
Seeker and Seer
There are two ways or modes of practicing: one can practice as a seeker or one can practice as a seer. A seeker practices with some motivity to see what benefit he can get. He might say to himself, let me do Adho Mukha Svanasana to stretch my calves or Sarvangasana to relax myself and remove the fatigue. Or he may do a pose with the preconceived idea of studying some part or aspect. In doing a pose he always has some aim, goal or specific purpose in mind. As a consequence of this, his observations are compartmental, limited, and narrow. The knowledge he gains tends to block further knowledge by putting an end to observations and leaving him with a feeling that he has accomplished what needs to be done.
A seer, however, enters into a pose simply ‘seeing’ or observing everywhere. He does not have a specific plan or preconceived idea about what he is going to observe or learn so the scope of his perception has no self-imposed limits. He simply ‘sees’ what is happening or not happening at that exact time. His insights come in a flash and they can be about anything like body, breath, intelligence, emotions, etc. but he does not know ahead of time what new light will flash in his mind or strike his intelligence. His approach is ever fresh and he remains ever-present, alert, and observant throughout his practice. His knowledge doe not block further knowledge because he remains ever a seer in his practices.
It is important to understand that one does not graduate from being a seeker to being a seer. They are entirely different ways or modes of practising. If one wants to be a seer, one has to practice as a seer.
Tracing Prakrti
Sometimes, when we do a pose, some new thing comes on its own. Normally we are just happy with the wonderful effect and our mind doesn’t go any further than being an enjoyer of that happiness. We are just an enjoyer of that new freedom. So nature (prakrti) gives us something but because of our sensual disposition we don’t go into why it came; we only go into the enjoying of it. Unconsciously we do not want to disturb the pleasure (preya) of our new experience with the difficulty (sreya) of the searching process. We don’t search what is the cause or source for this new thing that came. It may slip away at some future time and then we don’t know how to make it come again which results in mental or physical pain (dhukha) and suffering due to our loss. So nature gives and nature takes. If we do not make the attempt to understand it we are condemned to backsliding and suffering. To maintain our newfound freedom, we have to either catch in an instant why it came or if we cannot catch immediately then we must methodically trace the cause for what came and understand that.
Tracing Prakrti Exercise
By definition, you can’t command nature to give you some “new thing” so that you can trace it to its source. However, you can prepare yourself so that when some new thing comes, you will notice that. Or as Einstein said, “chance favors the prepared mind.”To prepare yourself, cast the net of your awareness inside your body to cognize the asanas that you do. Use your awareness like a tripwire. Then when something happens you may catch it as your mind is prepared. When it happens, ask yourself why did this new thing come at this time and also how did it come? What was the source for this thing that is coming?
Adjusting and Tracing
Once we have discriminated what needs to be done we now need to do it and observe if we were right in our postulations. Good corrections bring rhythm, harmony, balance, and flow into the pose. A correction is judged to be “good” if it brings the desired yogic effect in body, breath, and mind, etc. Learn to trace how your corrections cause other things to happen in the body.
Adjusting and Tracing Exercise
Do the above exercise but this time make the required corrections and trace when you make the correction what happens not only where you are acting but also what happens progressively further and further away from the area where you are making the correction. Study what the lack of symmetry caused to happen differently on the two sides by observing what changed during the correction.
Readjusting
Not all of your judgments will turn out to be correct. This should become apparent during the previous exercise. At this point, you need to readjust to come to a better pose.
Readjusting Exercise
Do the above exercise and readjust only those adjustments, which were incorrect maintaining the correct ones in order to come to a better pose.
Fading
When we make a correction we often think our job is over, but if we continue to watch that/those area(s) we can often see that within a short time what we did becomes either completely or partially undone on its own. This unconscious and unwanted undoing is called fading that must be studied to understand why it happens and how to prevent it from happening. As long as there is fading nothing can be built up.
Fading Exercise:
Do the above exercise and observe when the corrections you made begin to fade and analyze why they begin to fade.
Maintaining Freshness (using the timer):
It is often the case that the first moment in an asana you feel the freshest. That initial freshness however begins to fade after some time. Keep the timer in front of you and find out how long the freshness stays on its own. Then learn to extend the ability of the fibers to maintain their grip so that the freshness is maintained up to their capacity. Find out the capacity of those fibers by looking at the timer in front of them. When those fibers can no longer maintain you in the fresh pose then switch over to other fibers to see if you can maintain the fresh pose for a longer period of time using them. This is the secret of staying in asana for long periods of time to learn to extend and then maintain the fresh pose.
Maintaining freshness exercise (using the timer):
Go up in Sirsasana and feel the initial lightness in the head, neck & brain. See how the head is not pressurized, the neck is without the feeling of weight and the brain remains in the middle of the skull away from the floor. Observe also the mental clarity, alertness, and feeling of freedom that goes with this physical lightness. As you stay, observe how the head begins to become heavier, the neck begins to feel the weight, the brain begins to gravitate towards the inside of the skull near the floor and the mind becomes clouded, troubled, unintelligent, and petty. Note from the timer how long the fresh pose lasted before it faded. Also, observe what parts physically failed or changed their positions as the lightness & clarity left.
Go up again and attempt to extend the duration of the fresh pose by reinforcing the parts that faded earlier e.g. the shoulder blades. See how long the fibers hold their positions and compare the duration to the first attempt. When again the fresh pose begins to fade due to the fibers no longer being able to hold, try to regain the freshness by getting the lightness from different fibers e.g. legs
Dykes
Moving the blood from the outer buttocks to the inside in Natarajasana. In Utthita Trikonasana if you do normally the buttocks are out and the outer buttocks get the blood circulation. When you roll the bottom buttocks from outside in you create a dyke there and make the blood flow to the front side of that leg which was dry so you flood/soak the dry part.
Dykes to make the blood flow from the wet part to the dry part.
Dykes Exercise
Do Utthita Trikonasana as a beginner with the buttocks a little out. Find the change of flow of the blood in the buttocks between Utthita Trikonasana and Utthita Parsvakonasana you learn. Feel how the blood flow is greater in the protruding buttocks than in the corresponding area in the front. Now roll the bottom buttocks in and feel how you have created a “dyke” that has channeled the flow of blood more to the corresponding frontal area with the result that the previously “dry” is is now made “wet” or is being “soaked.”
Extending while Contracting
The medical science does not understand that you can contract a muscle and extend it too. They say that if it contracts anywhere it contracts everywhere. Only the yoga science tells how to extend it as well. Mastering this should lead to soft muscles as we see in light on yoga.
Extending while Contracting Exercise
Do Salamba Sarvangasana starting with the arms extended away from the body on the floor with the elbows straight and then try to maintain the length of the biceps while bending the elbows and placing the hands on the back.
Electrochemical versus Mechanical
In Salamba Sirsasana 1 How do the spine and the arms react if you lose the balance? How do the legs react? Q. Do they react with the same speed? A. No. Q. Which one reacts fast, which one reacts slow? A. The arms and spine react fast and the legs react slow. The spine is electrochemical and the feet are mechanical. Now in Tadasana, if you lose the balance what reacts fast, the feet or the arms? A. The feet react fast and the arms slow. Q Why?
Electrochemical versus Mechanical Exercise
Do Salamba Sirsasana 1 and compare when you wobble how quickly the hands and spine react compared to the legs. Now do Tadasana and compare how quickly the feet and legs react compared to the arms. Try to make out why.
Sensory vs Motor nerves (jnananendrias vs karmendriyas)
Sensory nerves when they work as motor nerves there is a jam. So sensory nerves don’t perceive anything and motor nerves don’t work. E.g. Bharadvajasana 1 in chair: leading side of back: the muscles work Karmendriyas.
Trailing side of back: the muscles don’t work but the skin does (wrong). So what happens if you make the muscles to work on the trailing side of the back? The skin on that side of the back becomes soft so the karmendriyas (organs of action) do their job of acting and the jnananendriyas (senses of perception) can do their job of sensing.
Example on skin of breeze strong and light. How do you enjoy a breeze if it is very strong? You don’t enjoy it. How does the skin become? It contracts against it. How do you enjoy a gentle breeze? You enjoy it and the skin relaxes. That is how you have to understand asanas.
Sensory vs Motor nerves Exercise (jnananendrias vs karmendriyas)
Do chair Bharadvajasana 1 and turn to the right. Feel how the right side of the back is doing with the motor nerves whereas the left side of the back is doing with the sensory nerves. Now activate the muscles of the left side of the back in such a way that the skin of the entire back (particularly the left side) relaxes. Feel how the motor nerves of the back are doing the motor job and the sensory nerves of the back are doing the sensory job as it should be.
Sapta Dhatus
The saptu dhatus are the 7 constituents of the body according to Ayurveda. They are in order;
- rasa/plasma
- rakta/blood cells
- masma/muscle
- medha/fat
- ashti/bones
- majja/marrow
- shukra seeman/ovum
According to Ayurveda this is the normal direction for the assimilation of food.
In Utthita Trikonasana the action is from the muscles to the bones so the action is in the same direction as the normal digestive flow of energy: from rasa/plasma to shukra seeman/ovum. However, in Ardha Chandrasana, the normal direction is reversed because it is the bones which acting and the muscles are getting sucked to the bones so the direction is from the bones to the muscles or from shukra seeman/ovum towards rasa/plasma. Hence this is a reverse flow which causes a “flushing” of the system in much the same way that you backflush a filter to remove the impurities that have collected there.
The idea was that only in yoga can you do this “back flushing” which cleanses the system.
Sapta Dhatus Exercise 1
Do and compare the front leg of Utthita Trikonasana to the standing leg of Ardha Chandrasana. In the front leg of Utthita Trikonasana, it is the muscles which are active and must grip to support the bone whereas in the standing leg of Ardha Chandrasana it is the bone which is active and the muscles get drawn towards the bone. If you do Ardha Chandrasana you get a “boney feeling” on that supporting heel bone which can be felt all the way up the bones of the leg. In Utthita Trikonasana you do not get this same “boney feeling” on the heel bone or up the leg like you do in Ardha Chandrasana. As a result, the entire leg gets a muscular feeling in Utthita Trikonasana.
Sapta Dhatus Exercise 2
You can experiment with this idea and find that you can often change the direction of the current in the same part of the body in the same pose. For instance, do Utthita Trikonasana independently in the middle of the room. The circulation is the normal direction: muscles towards the bones or rasa/plasma to shukra seeman/ovum. Now do Utthita Trikonasana at the horse with both feet blocked in using the quarter rounds. See how you can reverse the direction of flow even though it is the same pose.
Sapta Dhatus Exercise 3
Same idea with Supta Padangustasana 2 done independently and done using 2 walls to press both feet into.
No Loss of Energy
January. While most scholars view the eight stages of yoga as sequential stages of evolvement, Yogacharya Iyengar experienced that this is not the case. Each anga is an aspect of yogic practice and it is not possible to separate the practice as being practice of asanas, concentration (dharana), meditation (dhyana), and so on. Each practice deeply involves the other aspects also. Perfect asana is not possible without immense concentration and when it is so done the practitioner is in a meditative state. In such a practice the breathing is rhythmic (pranayama), the mind is involuting (pratyahara)and the practitioner experiences the glimpse of the universal vastness (Samadhi). To achieve this perfect asana requires discipline (yama niyama). There has to be a perfect balance of the body, harmony in the cells. While the body is exhibitive, the mind is contemplative. The pose appears dynamic within the sphere of stability. There is no loss of energy and after the practice the practitioner feels rejuvenated.
See also Light on Yoga and Light on Pranayama explanation of Savasana not to tilt and lose the energy but to maintain the energy inside the body for fast recovery.
Zero Pressure
What is really different about Iyengar yoga compared with other yogas?
The technique, you know today the world has improved to such an extent, we call high technics. So I thought that each of the poses we do should have zero pressure, that there should be, I have to adjust my muscles, I have to adjust my joints so that the pressure is not too much on one side too less on the other side that’s known as zero pressures, so I thought bringing zero pressures then the moment I learnt to bring zero pressures the mind is to become very light and in that lightness, I learned that there is something in this presentation which gives the mind as an instrument of observation not as an actor.

Individuality versus Universality
Conceive the body as a tube with the skin being the tube and everything inside the skin being the contents or conceive the body as being a river with the skin being the banks of the river and everything inside being the contents of that river i.e. the flowing water. Now, in an asana done “Universally” there is an uninterrupted flow of the contents of the body that results in the subjective experience of universality and non-individualism in that asana. Normally for us, the contents of the body get caught somewhere in contraction or tightness of the muscles so that the subjective experience is one of individuality i.e. one feels one’s separate self while doing the asana.
Individuality versus Universality Exercise
Do Chaturanga Dandasana or Urdhva Mukha Svanasana and feel which way does the contents of the body move in the feet, lower legs, knees, upper legs, hips, abdomen, chest, neck, head, and even in the eyes. Does it all move in the same direction and at the same speed or are there some areas where the direction of the contents is reversed or where the rate of movement is different from the other areas? Try to make the contents all move in the same direction at the same exact rate and notice the difference in the feeling of universality or individuality.
Individuality versus Universality Exercise #2
Do Chaturanga Dandasana or Urdhva Mukha Svanasana and have someone take a picture of you from the side. Compare this picture with the picture in Light on Yoga and see if your eye is drawn to any particular area in your photo compared to Mr. Iyengar’s photo i.e. does your picture seem to have a “center” or “centers” where your eye gets caught looking at this or that particular muscle/area? Alternatively, does your eye grasp the pose as a whole with no particular “center” as in Light on Yoga? Compare the two photos in this way then do the exercise above again paying particular attention to how those areas feel that most closely resembled the Light on Yoga picture and also those areas that did not at all look like the Light on Yoga photo.
Communion versus Communication
Communication is an exchange of information between individuals or separate parts of one’s self. When you feel separate from the part you are communicating with, that is communication where the sense of a separate self remains. Communion is a feeling of emotional or spiritual closeness or a sense of shared religious identity especially between different parts of ones’s self e.g. mind & knee. This is meditation.
Communion versus Communication Exercise 1
Do Ardha Chandrasana and open the back knee of the standing leg. Do Utthita Trikonasana and open the back knee of the front leg. Notice in Ardha Chandrasana it is a communion but in Utthita Trikonasana it is a communication.
Communion versus Communication Exercise 2
Do Utthita Trikonasana and stretch the inner knee of the front leg. Do Ardha Chandrasana and stretch the inner knee of the standing leg. Notice in Utthita Trikonasana it is a communion but in Ardha Chandrasana it is a communication.
Prana, Prajna and the methodology of inquiry
First, try to find out what is the difference. Second try to find out why is that difference occurring. Third, try to bring the good effect into the pose that does not have that good effect. That is to say, try to integrate the good action from the pose where it occurs naturally into the pose where it does not occur naturally.
Prana, Prajna and the methodology of inquiry Exercise
1) What is the difference?:
Sit in Dandasana then widen the legs to sit in Upavista Konasana. Sitting in Upavista Konasana is just Dandasana with the legs spread apart, but what difference is there between these two poses? Specifically, what comes well in Upavista Konasana that does not come well in Dandasana? Notice how the big toe has intelligence its own in Upavista Konasana but in Dandasana it does not have that intelligence on its own. In Dandasana the big toe tends to shrink and to make it intelligent you have to send the prana there whereas in Upavista Konasana the intelligence is there because the prana is there.
2) Why is the difference?:
But why is the prana there in Upavista Konasana but not there in Dandasana? Notice the weight on the back of the legs in Dandasana and compare it to Upavista Konasana. See how in Dandasana the back of the legs do not have as much weight and do not descend as much as in Upavista Konasana. In other words, the back of the legs in Upavista Konasana have more of the pritvi tattva (earth element) whereas in Dandasana they do not have so much the pritvi tattva. The descending of the legs causes the upward extension of the big toes.
3) Integrate (Y.S 2.33):
Now try to make the back of the legs of Dandasana descend like the back of the legs in Upavista Konasana. That is, try to bring the pritvi tattva into the back of the legs of Dandasana as much as they are in Upavista Konasana. See what happens to the big toes. Do they improve in their prajna?
How to communicate Bhairanga Sadhana with Antaranga Sadhana
Bhairanaga here means to activate the external cognizable part of the body to come close to antaranga vital organs, mind intelligence. Antaranga to antaratmata is to bring the I-ness and consciousness along with bahiranga and antaranga and to contact all these three: as if everything I is in touch with the core of the being without divisions.
Bhairanga sadhana is comprised of external practices when compared to antaranga sadhana and antaratma sadhana. When the consciousness is made to penetrate closer towards the self this is the threshold from bhairanga sadnaha to antaranga sadhana. Put another way, when the consciousness begins to penetrate past the outer layers of the skin inwards towards the core of the body this begins the process of antaranga sadhana. This penetration is trans-physical as it reveals aspects of the pranamayakosha and mental bodies.
Bhairanga Sadhana & Antaranga Sadhana Exercise
Do Padangustasana Dhanurasana (or Dhanurasana) and move the skin of the flesh towards the calf and the skin of the calf towards the shin. Then move the sides of the calves inwards towards the center of the lower leg. Feel how the consciousness is made to penetrate deeper into the body.
Epicenter
The epicenter is the place from where the right actions come. It is the place from which you can not think.
Antaratma Sadhana
Radiating from the Self Exercise
Do Trikonasana radiating from the Self within.
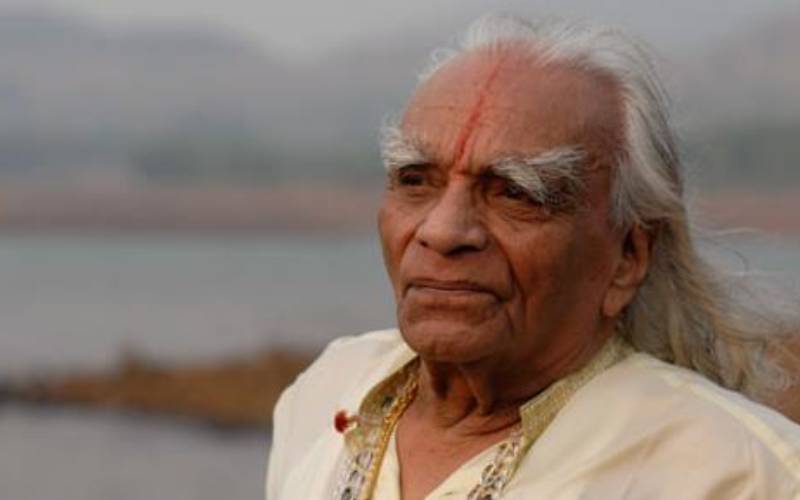
Share
Bellur Krishnamachar Sundararaja Iyengar, more popularly known as B.K.S. Iyengar is the founder of the Iyengar yoga style. He started teaching at the age of 18 in in 1937. He was an author of more than 15 books including Light on Yoga which was first published in 1966 and has not been out of publication since. He practiced yoga until the age of 90.