Overview of the sequence
Today I have chosen to work with diagonal Standing Poses as an inquiry into what these variations bring and how they might help when the hips or lower back/sacral areas are tight or restricted.
We will practise with the back foot to the wall to enhance stability in the poses which can allow the mind to focus on specific actions and to see what opening and freedom those action points bring. How might they help us create space in the restricted areas of the body?
Step by step guide to the sequence
Start off in Supta Virasana, and take time to properly settle and observe how your body presents in this first pose.
Follow with Virasana forward, already starting to focus attention on the inner and outer groins, or inner and outer edges of the buttock creases. See if you can feel that there are two red dots on those points (inner groin/buttock crease and outer edge, where the outer top thigh meets the outer buttock) and watch this area closely throughout the practice.
Come up to Uttanasana, and create more space and opening on those two points: inner and outer buttock creases. When those open out, you may find the hips feel as if they have more space, and some tightness gets released.
Adho Mukha Svanasana adding the points of the inner and outer armpit creases. These areas, if tight, can restrict the shoulders and the hips.
Adho Mukha Vrksasana, Full Arm Balance, going up leading with alternate legs, followed by Pincha Mayurasana, without a belt and block if possible. What happens when we remove the support? Is it always necessary and how does it help us in the pose? It is important not to be casual or habitual in the way we practise.
We will start the standing poses with Utthita Hasta Padangusthasana 1, done with wall support, and opening up the “red dots” at the back of the thighs. Then go to Utthita Hasta Padangusthasana 2. Explore the difference between placing the lifted foot in line with the inner arch of the standing leg, and then move the lifted foot forwards in line with the big toe of the standing leg. What does that change?
Standing Poses follow:
Start with the lateral Standing Poses setting up with the back foot to the wall, on the back outer edge of your mat, and the front foot on the opposite front edge of the mat. Watch how the back waist gets freer, the pelvic rim broader and the hip joints open more easily. This can also help to bring a balance to the sacral joints.
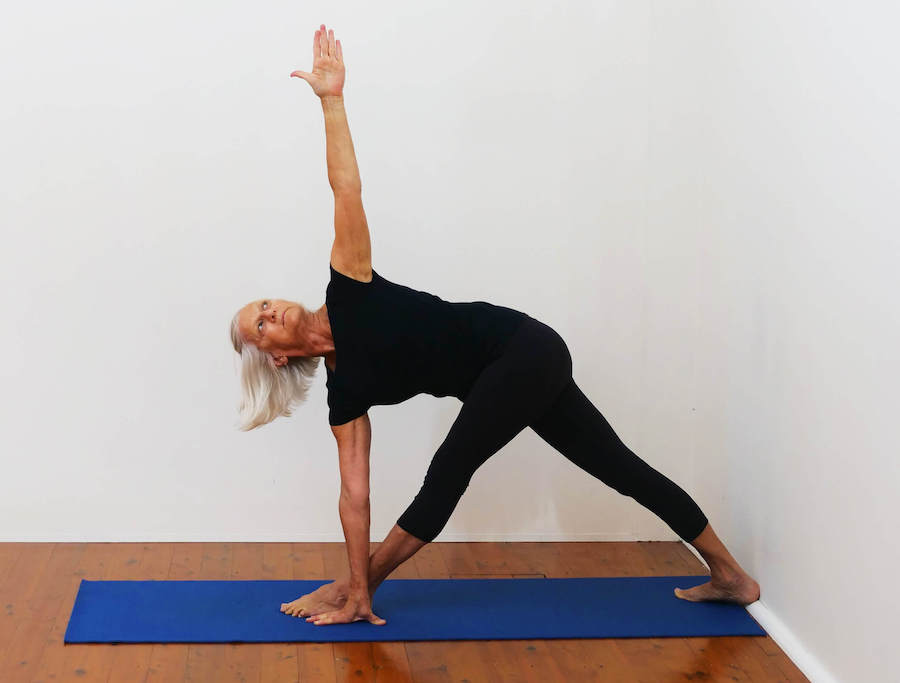
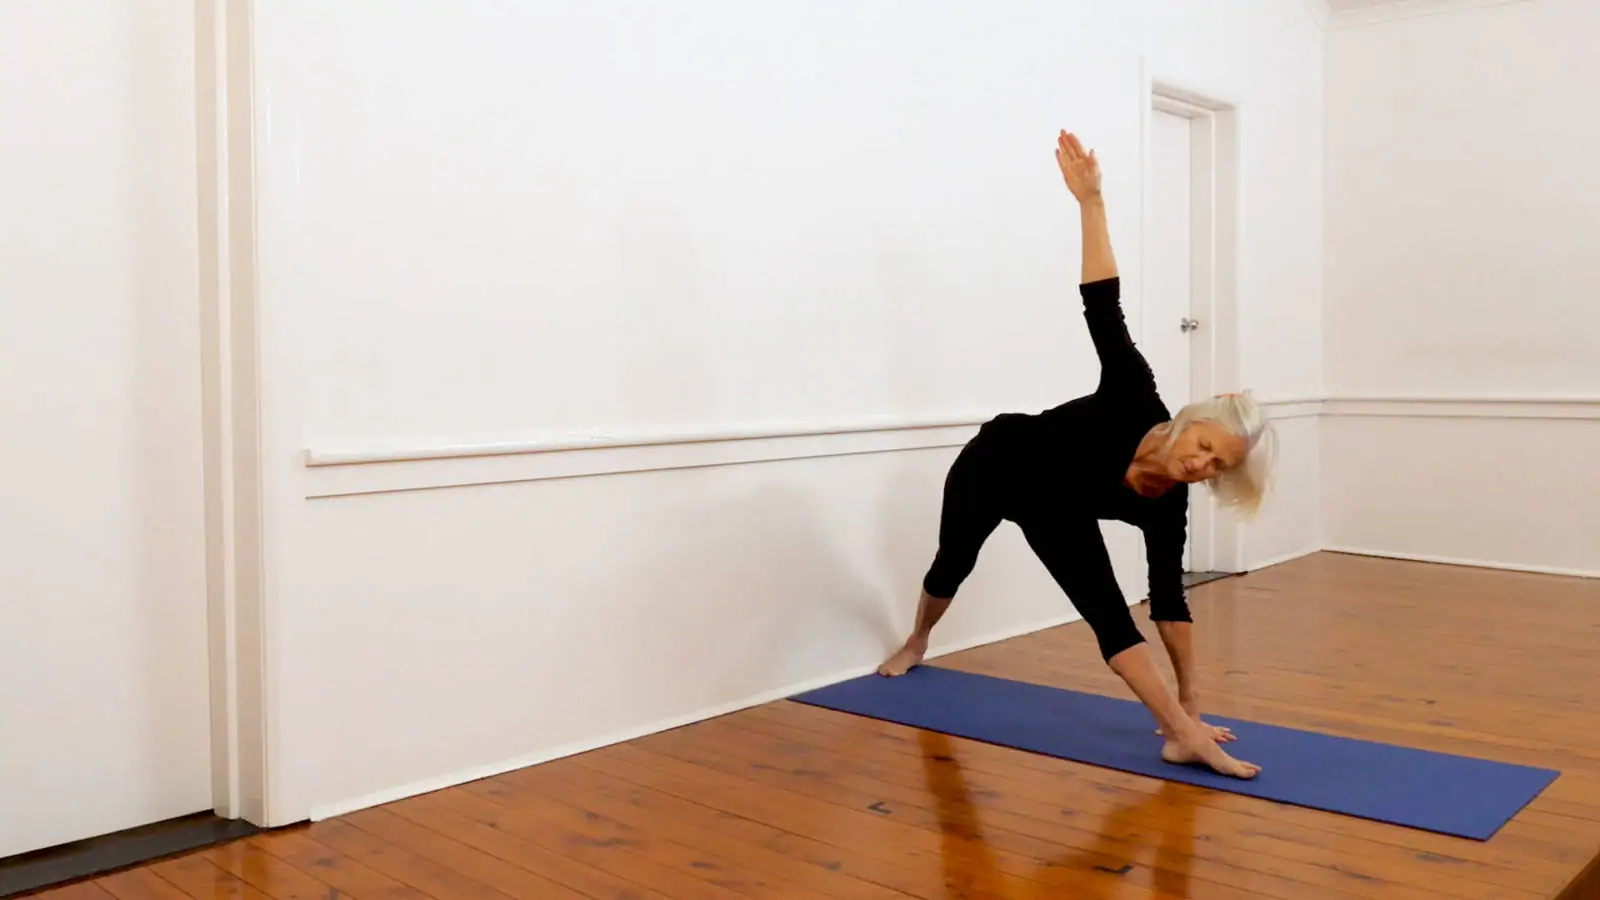
Trikonasana, Parsva Konasana, Virabhadrasana 2, Ardha Chandrasana with the back foot to the wall and taken back in line with the back heel.
Go now to the twisting Standing Poses and see what those same actions of spreading the inner and outer buttock crease points bring here: Parivrtta Ardha Chandrasana, and then Parivrtta Trikonasana and Parivrtta Parsvakonasana with the whole back to the wall.
Finish with Parsvottanasana, back foot to the wall, and hands to the floor. Can you feel your front hip bones lifting a little away from the thighs as you open the groins and extend forwards with the trunk?
Prasarita Padottanasana as a conclusion, balanced and steady to see what has come to the body and to the mind during the practice.
Set up in Virasana and add Parvatasana. Then Ubhaya Padangusthasana, which will show you what spreading and evenness have come into the back thighs through the standing pose work.
Explore those actions further in Supta Padangusthasana 1, 2 and 3, keeping your attention on the backs of the thighs so that there is no “shrinking” of the fibers of the legs. Watch the bottom leg thigh in particular, as it is the anchor for the pose.
Come up now for Sirsasana, Parsva Sirsasana and Eka Pada Sirsasana, or cross bolsters if not doing the full inversion today.
Continue with Sarvangasana, Eka Pada Sarvangasana, Halasana and Karna Pidasana, or Legs up the wall over a bolster, legs at 70 degrees and shoulders and head on the floor.
Simple cross legs forward, and even here observe your back thigh opening and see what that creates. Savasana, taking time to really “see” your body, and listen to what it is now feeding back to you.
Equipment required
- Mat
- Bolster
- 2x Blanket
Illustrated sequence of video
Download and print the free illustrated sequence of this video.