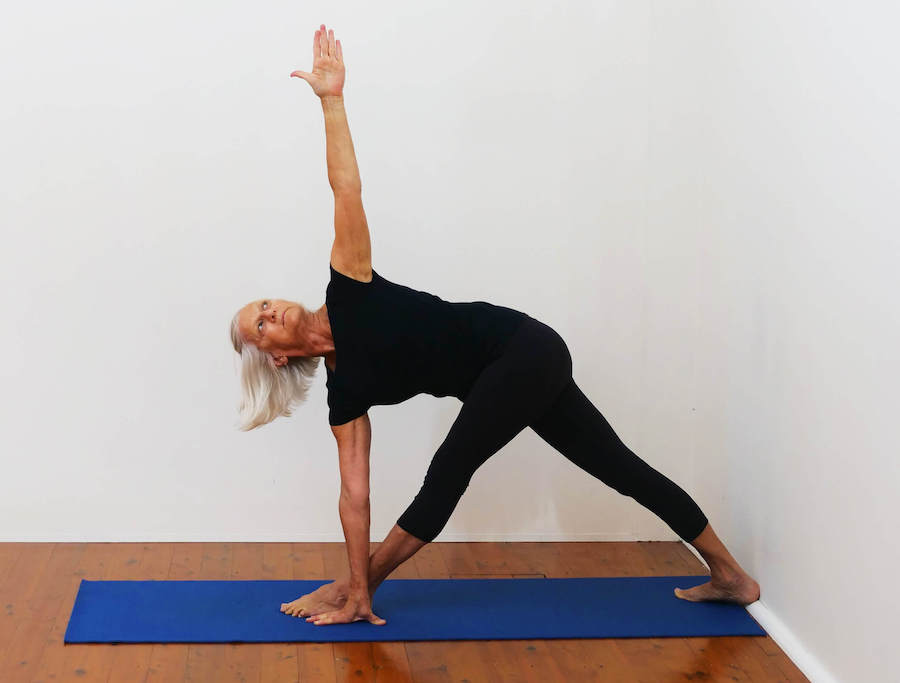
Introduction
In this forward bend sequence, we are looking to achieve an even extension across both sides of the body. For this reason, many of the standing and seated forward bends here will be asymmetrical. This way, we will be able to focus on each side of the body separately before going into a more grounded and balanced extension.
View sequence
Reclining Hero Pose
Lay on your back with your legs bent, your toes pointing backward.
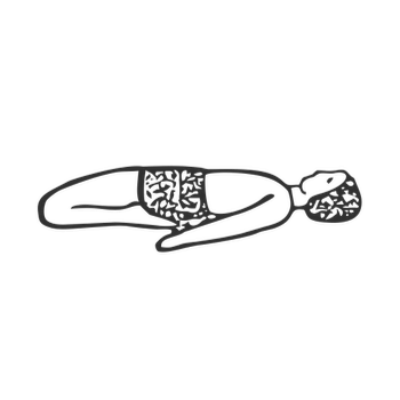
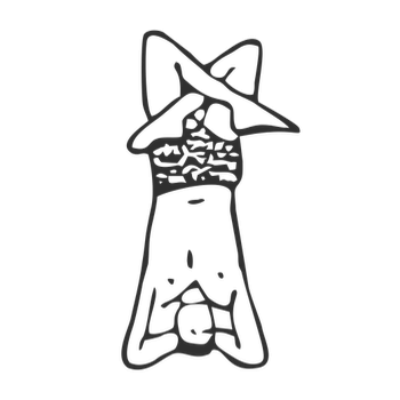
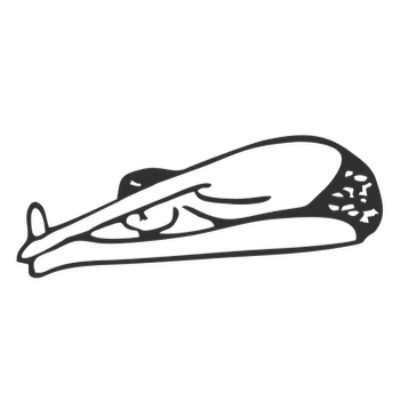
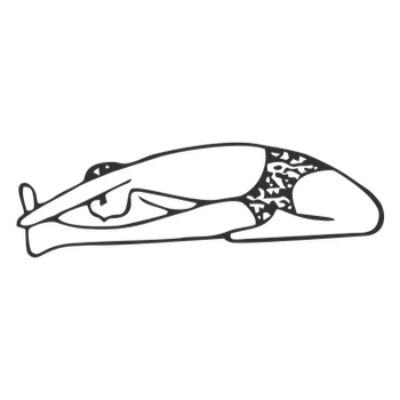
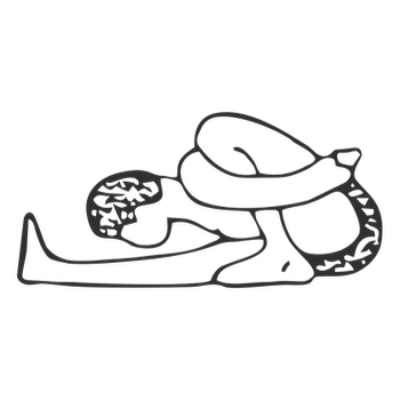
Downward-Facing Hero Pose
Join your feet together under your buttocks and keep your knees far enough apart for your ribs to fit in between your legs as you fold forward. You can rest your forehead on the floor or on a block.
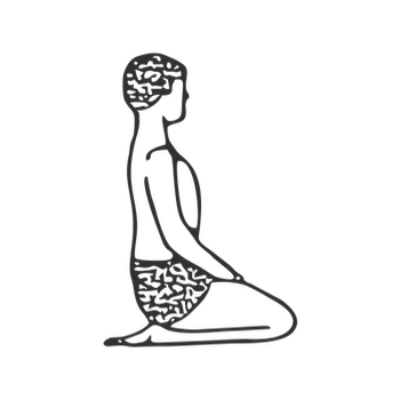
Cross Pose
Cross your legs and sit upright, extending upward through the crown of your head.
Standing Forward Bend
Starting in Tadasana, exhale and reach down towards your feet. Let your spine release downwards. You can bend your knees or place your hands on blocks if you lack the necessary flexibility.
Downward-Facing Dog Pose
Press evenly into your hands and feet. The main aim is to elongate the back of your body and lift your hips up as high off the ground as possible without losing the stable foundation created by your hands and feet. If you lack the hamstring flexibility, bend your knees a little.

Extended Hand-to-Big-Toe Pose 1
Grab your foot by the toe and straighten your leg, maintaining your Tadasana line. Lengthen through the crown of your head and keep your body from tipping over. Use wall support if you lack the balance. You can also use a belt if you lack hamstring flexibility.
Standing Forward Bend
Starting in Tadasana, exhale and reach down towards your feet. Let your spine release downwards. You can bend your knees or place your hands on blocks if you lack the necessary flexibility.

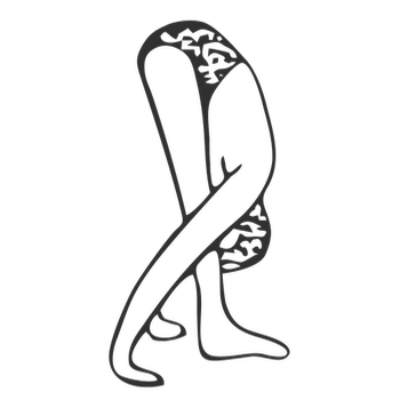
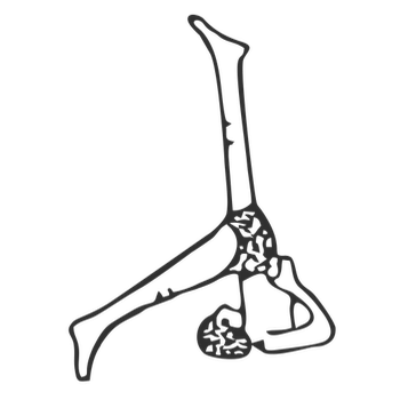
Standing Split Pose
Fold forward. Stay rooted through your left foot as you raise your right leg up to capacity.
Repeat on both sides.
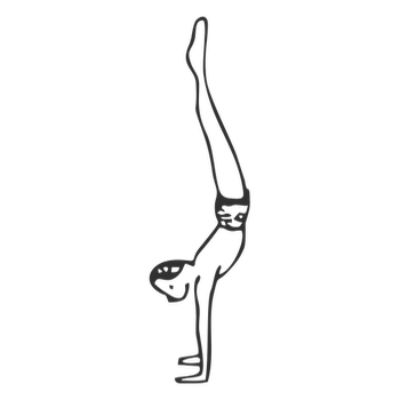
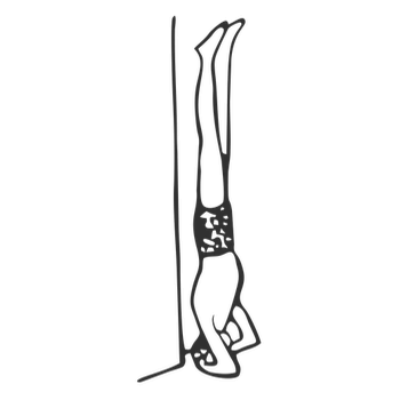
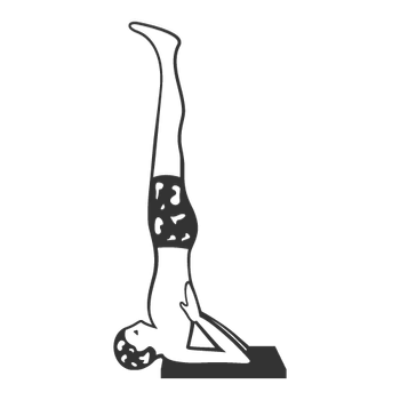
Full Arm Balance (Handstand)
Open your hands into the floor and strengthen your arms as you lift your body up, one leg at a time, into an inverted balance. Use the wall for support if necessary. If pushing yourself up proves to be too difficult, you can walk your feet up the wall.
Feathered Peacock Pose
Spread your weight evenly amongst your forearms and activate your shoulders as you lift yourself into this inverted balance. Use wall support if needed. You can also wrap a belt around your arms to keep them steady.
Downward-Facing Hero Pose
Join your feet together under your buttocks and keep your knees far enough apart for your ribs to fit in between your legs as you fold forward. You can rest your forehead on the floor or on a block.
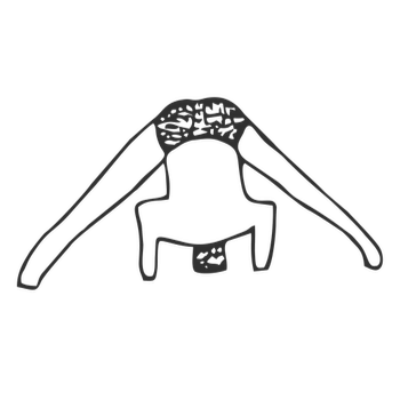
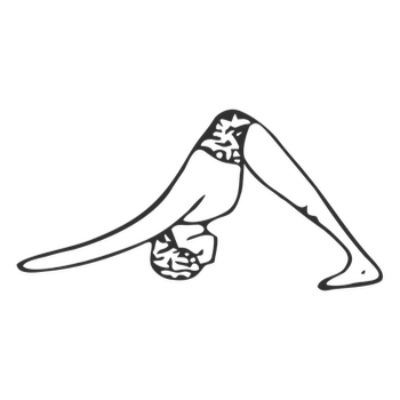
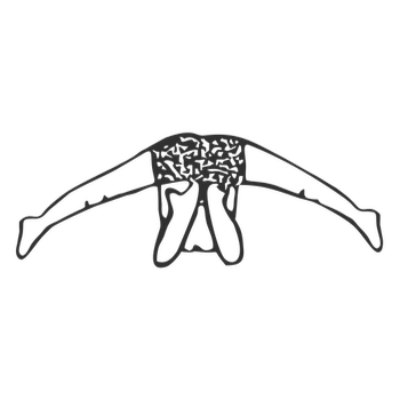
Wide-Legged Forward Bend
Plant your feet as wide apart as you can. Place your hands on the floor and lengthen forward through your spine. Once you have achieved the concave spine, start to walk your hands backward to capacity, aiming to lengthen and release your spine as evenly as possible.
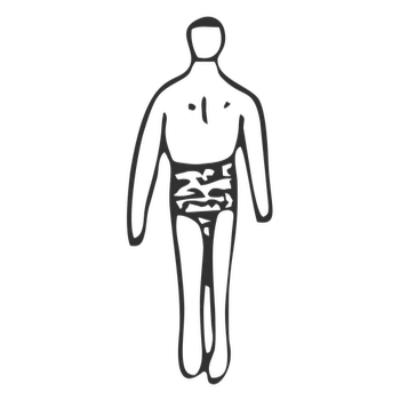
Mountain Pose
Stand up tall and straight, place your feet close together, with your heels and big toes touching. Imagine as if you are standing with your back against the wall. Extend your whole body from the heels up through the crown of your head.
Headstand 1
Activate your shoulders and upper back muscles as you lift your body up into inverted balance. Use the wall for support if necessary.
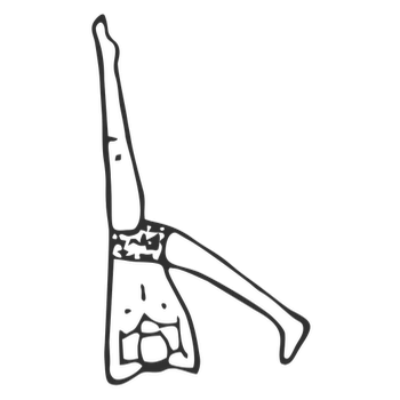
One-Legged Headstand Pose
Start in Sirsasana and bring one leg down to the floor. The other leg stays lifted and steady.
Downward-Facing Hero Pose
Join your feet together under your buttocks and keep your knees far enough apart for your ribs to fit in between your legs as you fold forward. You can rest your forehead on the floor or on a block.
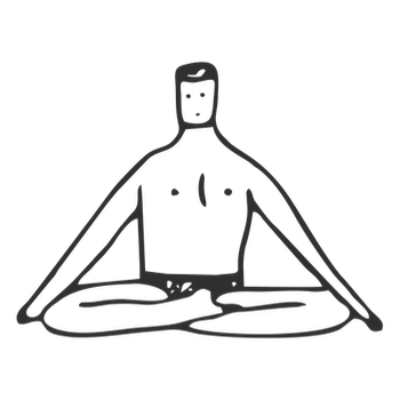
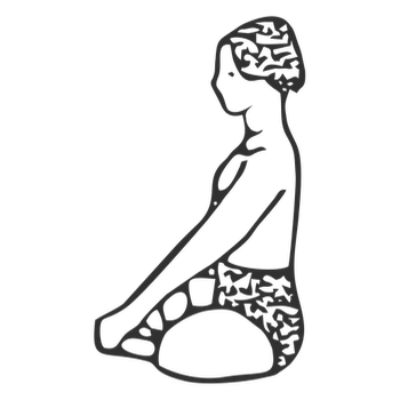
Hero Pose
Sit with your legs bent with your heels on either side of your buttocks. Keep your back straight, avoid sinking forward or back.
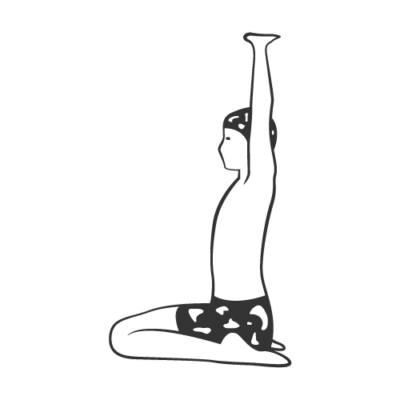
Mountain Pose in Hero Pose
Sit in Virasana, stretch your arms out in front of you, and interlock your fingers. Turn your palms outward and, keeping your shoulders down and ribs in neutral, extend your arms upward.
Staff Pose
Point your sit-bones down and extend your spine upwards through the crown of your head. Use support under your buttocks or bend knees if needed to get your back straight.
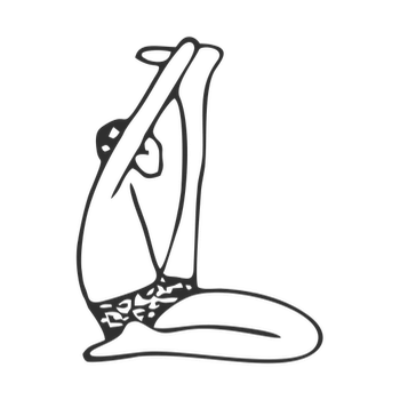
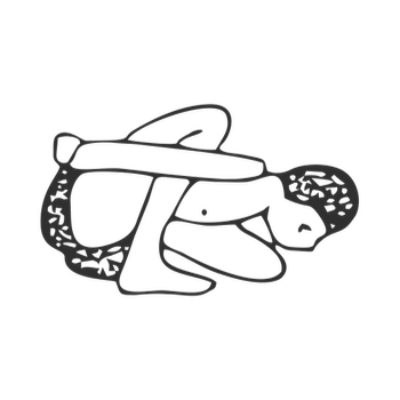
Double Toe Hold
Start in a seated position. Bend your knees and grab a hold of your big toes. Extend your legs up and balance yourself on your coccyx to assume a V-shape with your body. Pull your abs in, activate your core, open your chest. If you cannot reach your ankles, use a belt to help you reach your feet.
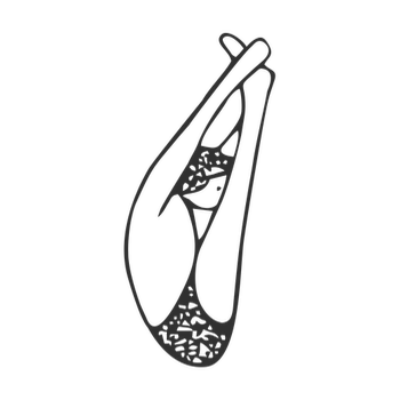
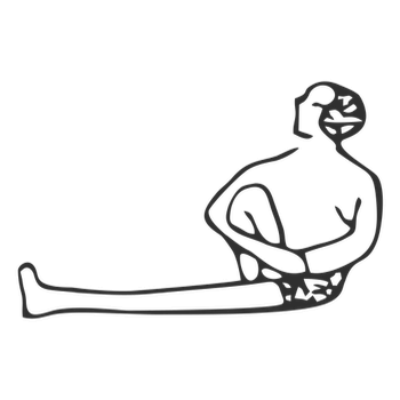
Heron Pose
Start in Dandasana. Bend one leg back into Virasana. Extend the other leg upward, so that, ideally, your shin meets your head. Use a belt if necessary.
Three-Limbed Forward Bend
Bend your left knee so your foot points straight back as you extend your right leg forward. Release your spine as you reach out to grab a hold of your extended foot. Use a belt if necessary.
Repeat on both sides.
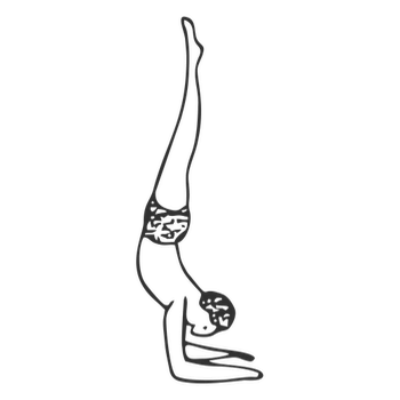
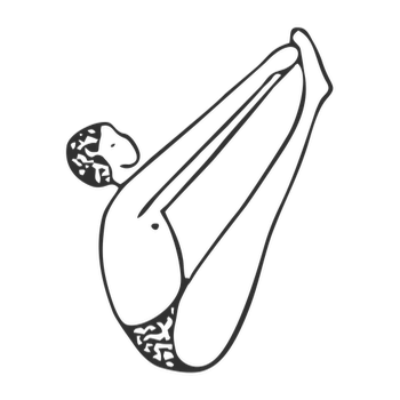
Upward Facing Intense Stretch Pose
Balance on your buttocks as you bring your legs up, aiming to reach your shins with your head. Draw your abs in and extend upwards through the crown of your head and the tips of your toes.
Seated Forward Bend
Make sure the backs of your legs are pressed firmly to the ground as you bend over to reach your feet. Release the spine. Use a belt if necessary.
Bound Angle Pose
Bring your feet as close as possible to your pelvis and join them together. Straighten your back and let gravity pull your knees down toward the floor. If necessary, use a strap to hold your feet in place.
Wide-Angle Seated Forward Bend
Use support under buttocks if your inner groins roll backward. Kneecaps and all ten toes face the ceiling. Keep your hands by your by hips, fingers pointing forwards. Lengthen your spine.
Once you have mastered these foundations, you can also bend forward while reaching your feet with your hands. Use a belt if necessary.
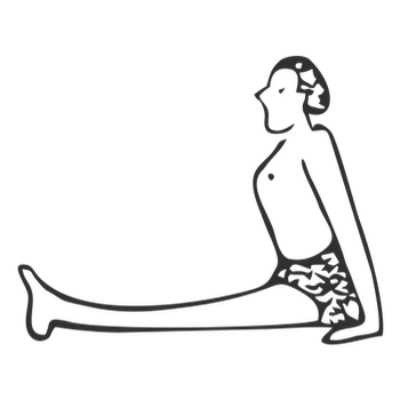
Head-to-Knee Forward Bend
Bend your knee out to the side and keep your sit-bones pointing downward as you stretch out over your extended leg. Use a belt if necessary.
Marichi's Pose I
Bend your left knee, placing the foot by your buttock as you extend the right leg forward. Then, reach your arms behind your back, looping your left arm over and around your bent knee. Join your hands behind your back. Bend forward to capacity.
Repeat on both sides.
Marichi's Pose III
Sit down with your legs stretched out. Bend your right knee and bring it close into your chest. Hook your left elbow on the outside of your right knee and twist. Repeat on each side.
Marichi's Pose II
Bend the left leg up for Padmasana and plant the right foot by your buttock as in Marichyasana I. Keep the bottom knee facing forward. Extend forwards and wrap your arms around, clasping your hands behind your back. Fold forward to capacity.
Repeat on both sides.
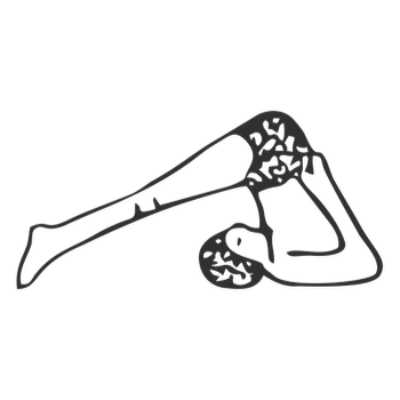
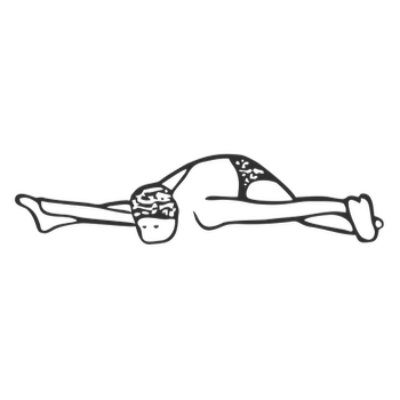
Plough Pose
Use support under your shoulders if necessary. Keeping your shoulders open, lift your hips up high above your head, dropping your feet down behind you. Place your hands on your back to help keep it from rounding.
Shoulderstand
Activate your arms and shoulders as you lift your body up perpendicular to the floor. Use blankets or bolsters to support your shoulders. Make sure the back of your neck stays relaxed and maintains its natural curve.
One-Legged Shoulderstand Pose
Activate your shoulders and lift your body up into a straight line. Place your hands on your back to help you keep your balance. Keeping your body straight and your hips aligned, bring one foot down behind your head.
Plough Pose
Use support under your shoulders if necessary. Keeping your shoulders open, lift your hips up high above your head, dropping your feet down behind you. Place your hands on your back to help keep it from rounding.
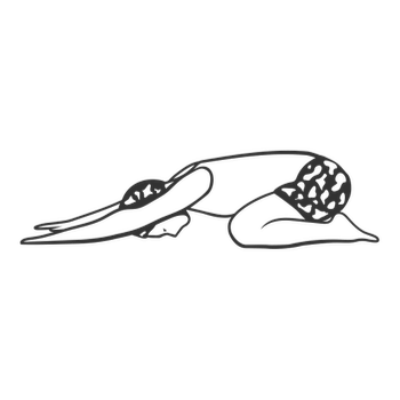
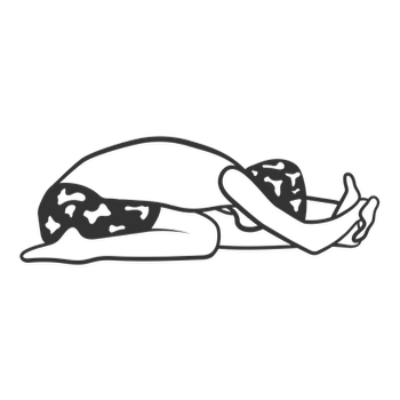
Reclining Angle Pose
Start in Halasana or Sarvangasana. Feet go down on the floor behind your head. Walk your feet outwards in opposite directions to capacity.
Place support in the form of blocks or folded up blankets beneath your back all the way from your thoracic to your lumbar spine. Your shoulders and head should be allowed to release down toward the floor. Relax in this pose. Start with knees bent, eventually extending your legs out in front of you. Use support under your head if you feel excess strain in your neck.
Downward-Facing Hero Pose
Join your feet together under your buttocks and keep your knees far enough apart for your ribs to fit in between your legs as you fold forward. You can rest your forehead on the floor or on a block.
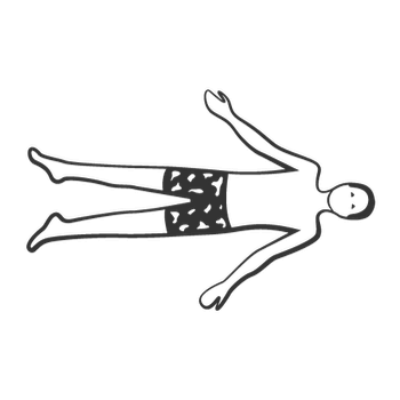
Corpse Pose
Lie down on the floor. Spread your arms and legs slightly at your side. Relax and concentrate on your breath.
Share
Save PDF and print
You are welcome to download the PDF of the sequence and print and distribute it freely. You may have to wait up to 30 seconds for the PDF to generate. Please credit the teacher who created it. All illustrations from Dona Holleman’s ‘Yoga Darśana’, RIMYI Institute texts and Yoga Vastu illustrators for original asana drawings.
By Pixie Lillas